Wild World is the fourth floating island of Floralia and serves as the fourth level in Kirby: Triple Deluxe.
General Information
Wild World is an exotic island showing little technological advancement. Most of the area is covered in lush jungle greenery; at the heart of the vegetation are multiple ancient temples, inspired by ancient Egyptian and Mayan pyramids. These temples contain many traps and Treasure Chests. Kirby must swim through waterfalls, traverse invisible floors in a haunted mansion, and dodge fire-spitting cobra statues as he chases the Dedede-snatching Taranza. Eight Sun Stones are required to open the boss stage.
Copy Abilities
Archer |
Beam |
Beetle |
Bell |
Bomb |
Circus |
Crash |
Cutter |
Fighter |
Fire |
Hammer |
 Hypernova |
Ice |
Leaf |
Needle |
Ninja |
Sleep |
Spark |
Spear |
Stone |
Sword |
Wheel |
Whip |
Wing |
Sun Stones
Stage 1
- Use Beetle from Hornhead to cut some of the grass. There's a Key and a locked door. Bring the key to the door, then enter. Go into the following optional room from there. Move the 8-ton weight so that it's above the Durable Blocks, and use Beetle to cut the rope. Pressing the Switch opens the gate above the other Durable Block as well as access to another 8-ton weight higher up. Move the second weight above the remaining Durable Block, and then cut the rope.
- Defeat the Key Dee. This is best done with a projectile, as when close, he hides in the background. Destroy the Bomb Block in the optional room to cause the platform underneath the Waddle Dees in the foreground to disappear, as they are obscuring a soft platform that leads to the Sun Stone.
- In the room with the spinning, spiked totem; in plain sight.
Stage 2
- In the room with waterfalls, skip the 3D Warp Star to go to the optional room. Swim to the right.
- Use Wheel from Grand Wheelie to drive on the river, destroy some blocks on its surface, and pass through Gordos.
- In the background of the last room, destroy the Bomb Block near the Barbar.
Stage 3
- One of the Nidoos disguised as a platform will leave behind spikes and an optional door in its place. Use the triple 3D Tilt Missile to hit the Star Block, the Bomb Block, and the switch respectively.
- Bring the Key in the second Truth Mirror room to the locked door. It can be found in the top left of the area.
- User Hypernova to inhale the Ace Foorlowber in the second Hypernova room.
- Inhale the curtain from the window to burn away the Nidoos, revealing the real door. Inhale the window panes to cause the Sun Stone to enter the room.
Stage 4
- Use the 3D Laser Bar to get the Treasure Chest in the background.
- Defeat Blocky before the Treasure Chest in the background goes too far.
- In the second Flame Cobra room, allow the Collapse Blocks to disappear.
Stage 5
- In the room with the scale platforms, defeat the Waddle Doo in the background. Go back to the foreground and stand on the corresponding platform to cause the platform the Waddle Doo was standing on to rise. Below the platform is a Treasure Chest.
- Use Fire to burn grass to find a Key. In the background is a locked door with a Treasure Chest behind it.
- In the same room, burn the grass below the Pacto to reveal an optional door. In the optional room, defeat the Cappy in order to lift its scale platform. Once the platform the Cappy was standing on is at high as it can get, go back to the background, grab the Key, get on the right platform, and then get onto the lifted left platform to open the locked door.
- Use the 3D Helmet Cannon to destroy the Durable Blocks and Bomb Blocks in the background and foreground to gain access to the Treasure Chests. This also gives the rare keychain.
Stage 6
- Defeat Coily Rattler.
Stage 7
- Destroy the Star Blocks obscuring the optional door. Light the fuse and title the block to keep the spark going.
- In Treasure Chest after defeating Bonkers DX.
Rare keychains
| Stage | Rare keychain | Image | Guide |
|---|---|---|---|
| Stage 1 | Gold Waddle Dee | 
|
Defeat the Pacto the appears in the ceiling. Hover above. |
| Stage 2 | Dimension Mirror | 
|
Skip the end door. Near the top left is a door to a Secret area. In the optional room, avoid the 3D Warp Stars on the way up. |
| Stage 3 | UFO Kirby | 
|
In the second Truth Mirror room, look for the stair that doesn't have any spikes. It has a yellow strip on it to further help differentiate it. It leads to a Secret area. Pressing the switch will destroy the blocks on the top left, then bottom left, top right, and then bottom right. |
| Stage 4 | Shocked Dedede | 
|
In the room with Bandana Waddle Dee, instead of going down, go upward and to the right. There's an alcove with a Searches and a crate. |
| Stage 5 | Marx | 
|
Use the 3D Helmet Cannon to destroy the Durable Blocks and Bomb Blocks in the background and foreground to gain access to the Treasure Chests. This also gives a Sun Stone. |
| Stage 7 | Boss Butch | 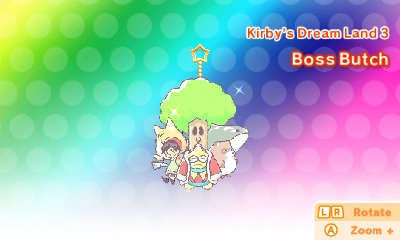
|
Get all three Keys to the locked doors. |
In Other Languages
| Names, etymology and in other regions | ||
|---|---|---|
| Language | Name | Definition, etymology and notes |
| ワイルド ワールド | Officially romanized as Wild World. | |
| Wild World | ||
(Traditional) |
狂野世界 | Translates to Wild World. |
| Hüter des Hochlands | Translates to Highland Guardian. | |
(General) |
Univers Ubuesque | Translates to Ludicrous Universe. |
| Rovine Rocciose | Translates to Rocky Ruins. | |
(General) |
Ruta Recóndita | Translates to Recondite Route. |
Trivia
- In the last room in Stage 3, one can see portraits of Taranza, Magolor, and a landscape from Cookie Country.
- The music that plays in the ruins area is a remix of the music that plays in Cocoa Cave from Kirby Super Star.
- At one point in Stage 5, Kirby must battle Flame Galboros. Two blocks in the center of the floor can be destroyed using Timed Dynamite supplied earlier in the room; if Kirby blasts these blocks and stands to the left of the pit, Flame Galboros will leap into it and defeat itself instantly. This trick seems to be a homage to the Sub-Tree Area Bonkers fight in Kirby Super Star (Ultra)'s The Great Cave Offensive. (Kirby can end that battle immediately by breaking the bricks underneath Bonkers, plummeting him into a pit.)
Gallery
")
")
")
Kirby swims in a waterfall.
")
Kirby crouches inside a haunted mansion.
")
Kirby discovers one of the island's gold temples.
")
Kirby travels through an ancient temple.
")
Kirby fires out of a cannon.
")
Kirby battles Coily Rattler.
")
Kirby prepares to fire out of a ground-mounted cannon.