(I knew I saw these somewhere before.) |
No edit summary |
||
| (One intermediate revision by one other user not shown) | |||
| Line 1: | Line 1: | ||
| − | {{About|the item in Kirby: Planet Robobot|override=For the collectibles in the [[Super Smash Bros. series]], see [[Sticker (Super Smash Bros. series)]].}} |
+ | {{About|the item in Kirby: Planet Robobot and Super Kirby Clash|override=For the collectibles in the [[Super Smash Bros. series]], see [[Sticker (Super Smash Bros. series)]].}} |
{{Item-infobox |
{{Item-infobox |
||
|image = [[File:KPR Robobot Stickers.png]] |
|image = [[File:KPR Robobot Stickers.png]] |
||
| Line 1,451: | Line 1,451: | ||
|- |
|- |
||
|Basic 1 |
|Basic 1 |
||
| + | |''[https://japanesenintendo.com/2016/04/28/kirby-stickers-now-available-nintendo-have/ LINE]'' |
||
| − | |''LINE'' |
||
|[[File:SKC_Sticker_sprite_1.png|75px]] |
|[[File:SKC_Sticker_sprite_1.png|75px]] |
||
|N/A |
|N/A |
||
| Line 1,458: | Line 1,458: | ||
|- |
|- |
||
|Basic 2 |
|Basic 2 |
||
| + | |''[https://japanesenintendo.com/2016/04/28/kirby-stickers-now-available-nintendo-have/ LINE]'' |
||
| − | |''LINE'' |
||
|[[File:SKC_Sticker_sprite_2.png|75px]] |
|[[File:SKC_Sticker_sprite_2.png|75px]] |
||
|N/A |
|N/A |
||
| Line 1,465: | Line 1,465: | ||
|- |
|- |
||
|Basic 3 |
|Basic 3 |
||
| + | |''[https://japanesenintendo.com/2016/04/28/kirby-stickers-now-available-nintendo-have/ LINE]'' |
||
| − | |''LINE'' |
||
|[[File:SKC_Sticker_sprite_3.png|75px]] |
|[[File:SKC_Sticker_sprite_3.png|75px]] |
||
|N/A |
|N/A |
||
| Line 1,472: | Line 1,472: | ||
|- |
|- |
||
|Basic 4 |
|Basic 4 |
||
| + | |''[https://japanesenintendo.com/2016/04/28/kirby-stickers-now-available-nintendo-have/ LINE]'' |
||
| − | |''LINE'' |
||
|[[File:SKC_Sticker_sprite_4.png|75px]] |
|[[File:SKC_Sticker_sprite_4.png|75px]] |
||
|N/A |
|N/A |
||
| Line 1,479: | Line 1,479: | ||
|- |
|- |
||
|Basic 5 |
|Basic 5 |
||
| + | |''[https://japanesenintendo.com/2016/04/28/kirby-stickers-now-available-nintendo-have/ LINE]'' |
||
| − | |''LINE'' |
||
|[[File:SKC_Sticker_sprite_5.png|75px]] |
|[[File:SKC_Sticker_sprite_5.png|75px]] |
||
|N/A |
|N/A |
||
| Line 1,486: | Line 1,486: | ||
|- |
|- |
||
|Basic 6 |
|Basic 6 |
||
| + | |''[https://japanesenintendo.com/2016/04/28/kirby-stickers-now-available-nintendo-have/ LINE]'' |
||
| − | |''LINE'' |
||
|[[File:SKC_Sticker_sprite_6.png|75px]] |
|[[File:SKC_Sticker_sprite_6.png|75px]] |
||
|N/A |
|N/A |
||
| Line 1,493: | Line 1,493: | ||
|- |
|- |
||
|Basic 7 |
|Basic 7 |
||
| + | |''[https://japanesenintendo.com/2016/04/28/kirby-stickers-now-available-nintendo-have/ LINE]'' |
||
| − | |''LINE'' |
||
|[[File:SKC_Sticker_sprite_7.png|75px]] |
|[[File:SKC_Sticker_sprite_7.png|75px]] |
||
|N/A |
|N/A |
||
Revision as of 18:18, 1 June 2020
| This article is about the item in Kirby: Planet Robobot and Super Kirby Clash. For the collectibles in the Super Smash Bros. series, see Sticker (Super Smash Bros. series). |
| “ | Hey, Kirby! Feeling excited? Chipper? Victorious? Why not buy some Stickers to convey your feelings to your teammates?” |
| — Magolor • Super Kirby Clash |
Stickers are items in the Kirby series, debuting in Kirby: Planet Robobot.
General Information
There are a total of 200 stickers to collect throughout Kirby: Planet Robobot. Most appear as silver and blue paper circles with a peeled-up edge and a question mark on them. Rare stickers look the same but with a gold and rainbow color scheme.
Stickers are found within stages and are even given as prizes for landing on cloud 1 in the Goal Game. StreetPassing a player who also owns a copy of Kirby: Planet Robobot will cause Bandana Waddle Dee to appear mid-stage and toss Kirby one. Once the stage is completed, the stickers Kirby collected are revealed. The hero can pick up stickers he already has, so collecting them all is time-consuming. Additionally, the player can buy stickers for three Play Coins apiece; after purchasing five, he/she must finish a stage before more can be bought. Rare, gold stickers cannot be purchased with Play Coins, and must be found hidden inside stages. Alternatively, Bandana Waddle Dee may toss one if two players have StreetPassed each other a few times.
A sticker takes the form of a decorative decal that can be applied to Kirby's Robobot Armor. Collected stickers may be viewed and applied to the Robobot Armor in the Sticker Room. The Sticker Room may be accessed via the game's main menu or through a button on the bottom screen during the stage select menu in Story Mode. Most depict new artwork or cultural symbols, while others feature promotional artwork from past Kirby games.
Stickers are used in Super Kirby Clash as a form of communicating with other players online during and before battles. Various stickers have characters, phrases, and sound effects based on the depicted character to depict personality and get general messages across. They can also be used in Story Quests, but they serve no purpose when used as such.
List
Kirby: Planet Robobot
| Name | Game | Type | Location | Image | Notes |
|---|---|---|---|---|---|
| Kirby Gear | Normal | Various | 
|
||
| King Dedede Gear | Normal | Various | 
|
||
| Meta Knight Gear | Normal | Various | 
|
||
| Waddle Dee Gear | Normal | Various | 
|
||
| Robobot Armor Gear | Normal | Various | 
|
||
| Comic Book Kirby | Normal | Various | 
|
||
| Comic Book Dedede | Normal | Various | 
|
||
| Comic Book Meta Knight | Normal | Various | 
|
||
| Comic Book Waddle Dee | Normal | Various | 
|
||
| Comic Book Whispy Woods | Normal | Various | 
|
||
| Comic Book Kracko | Normal | Various | 
|
||
| Manga Kirby | Normal | Various | 
|
||
| Manga Dedede | Normal | Various | 
|
||
| Manga Meta Knight | Normal | Various | 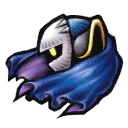
|
||
| Manga Bandana Waddle Dee | Normal | Various | 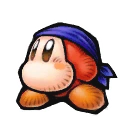
|
||
| Manga Bonkers | Normal | Various | 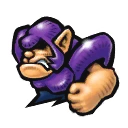
|
||
| Manga Mr. Frosty | Normal | Various | 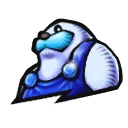
|
||
| Kirby Medal | Normal | Various | 
|
||
| King Dedede Medal | Normal | Various | 
|
||
| Meta Knight Medal | Normal | Various | 
|
||
| Bandana Waddle Dee Medal | Normal | Various | 
|
||
| Kirby Emblem | Normal | Various | 
|
||
| King Dedede Icon | Rare | Rhythm Route, Stage 1 | 
|
The symbol on the back of King Dedede's coat | |
| Meta Knight Icon | Rare | Gigabyte Grounds, Stage 1 | 
|
The symbol on Meta Knight's left shoulder pauldron | |
| Tool Icon | Normal | Various | 
|
||
| Heart Icon | Normal | Various | 
|
||
| Star Icon | Normal | Various | 
|
||
| Music Icon | Normal | Various | 
|
||
| Kirby Doodle | Normal | Various | 
|
A possible reference to the Kirby: Right Back at Ya! episode Cartoon Buffoon | |
| King Dedede Doodle | Normal | Various | 
|
A possible reference to the Kirby: Right Back at Ya! episode Cartoon Buffoon, strengthened by the star design on Dedede's crown | |
| Meta Knight Doodle | Normal | Various | 
|
A possible reference to the Kirby: Right Back at Ya! episode Cartoon Buffoon | |
| Bandana Waddle Dee Doodle | Normal | Various | 
|
A possible reference to the Kirby: Right Back at Ya! episode Cartoon Buffoon | |
| Waddle Doo Doodle | Normal | Various | 
|
A possible reference to the Kirby: Right Back at Ya! episode Cartoon Buffoon | |
| Daroach Doodle | Normal | Various | 
|
A possible reference to the Kirby: Right Back at Ya! episode Cartoon Buffoon | |
| Magolor Doodle | Normal | Various | 
|
A possible reference to the Kirby: Right Back at Ya! episode Cartoon Buffoon | |
| Taranza Doodle | Normal | Various | 
|
A possible reference to the Kirby: Right Back at Ya! episode Cartoon Buffoon | |
| Susie | Rare | Access Ark, Stage 5 | 
|
Similar to Susie's official artwork from Kirby: Planet Robobot | |
| President Haltmann | Rare | Unlocked by collecting all Code Cubes | 
|
||
| Haltmann Works Co. Logo | Rare | Access Ark, Stage 1 | 
|
||
| "Kirby" | Normal | Various | 
|
||
| "King" | Normal | Various | 
|
||
| "Knight" | Normal | Various | 
|
||
| "Star" | Normal | Various | 
|
||
| "Iron" | Normal | Various | 
|
||
| "Dream Land" | Normal | Various | 
|
||
| "Game" | Normal | Various | 
|
||
| "New" | Normal | Various | 
|
||
| "Go" | Normal | Various | 
|
||
| "Cool" | Normal | Various | 
|
||
| "Hot" | Normal | Various | 
|
||
| "Good" | Normal | Various | 
|
||
| "Re:" | Normal | Various | 
|
||
| "Pop" | Normal | Various | 
|
||
| "EX" | Normal | Various | 
|
||
| "DX" | Normal | Various | 
|
||
| "NEO" | Normal | Various | 
|
||
| "HAL" | Rare | Resolution Road, Stage 6 | 
|
||
| "Star" Kanji | Normal | Various | 
|
A reference to the game series' common theme revolving around stars. | |
| "Big" Kanji | Normal | Various | 
|
A reference to King Dedede (works in tandem with the "King" Kanji to form "Great King") | |
| "King" Kanji | Normal | Various | 
|
A reference to King Dedede (works in tandem with the "Big" Kanji to form "Great King") | |
| "Land" Kanji | Normal | Various | 
|
A reference to Rick | |
| "Sea" Kanji | Normal | Various | 
|
A reference to Kine | |
| "Sky" Kanji | Normal | Various | 
|
A reference to Coo | |
| "Dream" Kanji | Normal | Various | 
|
A reference to the Fountain of Dreams (used in tandem with the "Fountain" Kanji) | |
| "Fountain" Kanji | Normal | Various | 
|
A reference to the Fountain of Dreams (used in tandem with the "Dream" Kanji) | |
| "Mirror" Kanji | Normal | Various | 
|
A reference to the Mirror World | |
| "False" Kanji | Normal | Various | 
|
A reference to Magolor/Marx | |
| "Demon" Kanji | Normal | Various | 
|
A reference to Kirby, who is occasionally referred to as the Pink Demon, particularly in Japan | |
| "Soul" Kanji | Normal | Various | 
|
A reference to all "Soul" final bosses in the Kirby series | |
| "Steel" Kanji | Normal | Various | 
|
A reference to one of the proposed names for Kirby: Planet Robobot, "Kirby: HAGANE" with hagane meaning "steel" | |
| "Human" Kanji | Normal | Various | 
|
A reference to Adeleine, the only human to appear in the Kirby series (excluding cameos) | |
| "Pink Ball" Kanji | Rare | Gigabyte Grounds, Stage 3 | 
|
A reference to Kirby | |
| Number 0 | Normal | Various | 
|
||
| Number 1 | Normal | Various | 
|
||
| Number 2 | Normal | Various | 
|
||
| Number 3 | Normal | Various | 
|
||
| Number 4 | Normal | Various | 
|
||
| Number 5 | Normal | Various | 
|
||
| Number 6 | Normal | Various | 
|
||
| Number 7 | Normal | Various | 
|
||
| Number 8 | Normal | Various | 
|
||
| Number 9 | Normal | Various | 
|
||
| Kirby | Rare | Overload Ocean, Stage 1 | 
|
Kirby's official artwork from Kirby's Dream Land, enhanced for Kirby's Dream Collection Special Edition | |
| Flotzo | Normal | Various | 
|
Flotzo's official artwork from Kirby's Dream Land | |
| Squishy | Normal | Various | 
|
Squishy's official artwork from Kirby's Dream Land | |
| Whispy Woods | Normal | Various | 
|
Whispy Woods' official artwork from Kirby's Dream Land | |
| Kracko | Normal | Various | 
|
Kracko's official artwork from Kirby's Dream Land | |
| King Dedede | Normal | Various | 
|
King Dedede's official artwork from Kirby's Dream Land | |
| Paint Roller | Normal | Various | 
|
Paint Roller's official artwork from Kirby's Adventure | |
| Mr. Shine | Normal | Various | 
|
Mr. Shine's official artwork from Kirby's Adventure | |
| Mr. Bright | Normal | Various | 
|
Mr. Bright's official artwork from Kirby's Adventure | |
| Meta Knight | Normal | Various | 
|
Meta Knight's official artwork from Kirby's Adventure | |
| Star Rod Kirby | Rare | Patched Plains, Stage 1 | 
|
Star Rod Kirby's official artwork from Kirby's Adventure, enhanced for Kirby's Dream Collection Special Edition | |
| Nightmare Wizard | Rare | Access Ark, Stage 2 | 
|
Nightmare's official artwork from Kirby's Adventure | |
| Kirby | Normal | Various | 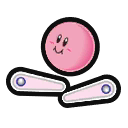
|
Kirby's official artwork from Kirby's Pinball Land | |
| Kirby | Normal | Various | 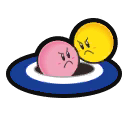
|
Part of Kirby's Dream Course’s Japanese box art | |
| Rick | Normal | Various | 
|
Rick's official artwork from Kirby's Dream Land 2, with the color palette of his Kirby's Star Stacker artwork | |
| Kine | Normal | Various | 
|
Kine's official artwork from Kirby's Dream Land 2, with the color palette and tilt of his Kirby's Star Stacker artwork | |
| Coo | Normal | Various | 
|
Coo's official artwork from Kirby's Dream Land 2 | |
| Masher | Normal | Various | 
|
Masher's official artwork from Kirby's Dream Land 2 | |
| Ice Dragon | Normal | Various | 
|
Ice Dragon's official artwork from Kirby's Dream Land 2 | |
| Dark Matter | Rare | Rhythm Route, Stage 4 | 
|
Dark Matter's official artwork from Kirby's Dream Land 2 | |
| Tac | Normal | Various | 
|
Tac's official Helper artwork from Kirby Super Star | |
| Axe Knight | Normal | Various | 
|
Axe Knight's official artwork from Kirby Super Star | |
| Mace Knight | Normal | Various | 
|
Mace Knight's official artwork from Kirby Super Star | |
| Trident Knight | Normal | Various | 
|
Trident Knight's official artwork from Kirby Super Star | |
| Javelin Knight | Normal | Various | 
|
Javelin Knight's official artwork from Kirby Super Star | |
| Gordo | Normal | Various | 
|
Gordo's official artwork from Kirby Super Star | |
| Dyna Blade | Normal | Various | 
|
Dyna Blade's official artwork from Kirby Super Star | |
| Marx | Rare | Resolution Road, Stage 4 | 
|
Marx's official artwork from Kirby Super Star | |
| Gooey | Rare | Resolution Road, Stage 2 | 
|
Gooey's official artwork from Kirby's Dream Land 3 | |
| Nago | Normal | Various | 
|
Nago's official artwork from Kirby's Dream Land 3 | |
| Pitch | Normal | Various | 
|
Pitch's official artwork from Kirby's Dream Land 3 | |
| ChuChu | Normal | Various | 
|
ChuChu's official artwork from Kirby's Dream Land 3 | |
| Dark Matter | Normal | Various | 
|
Dark Matter's official artwork from Kirby's Dream Land 3 | |
| Zero | Rare | Access Ark, Stage 3 | 
|
0's official artwork from Kirby's Dream Land 3 | |
| Rick Block | Normal | Various | 
|
Rick's official artwork from Kirby's Star Stacker | |
| Kine Block | Normal | Various | 
|
Kine's official artwork from Kirby's Star Stacker | |
| Coo Block | Normal | Various | 
|
Coo's official artwork from Kirby's Star Stacker | |
| Mr. Star | Normal | Various | 
|
Mr. Star's official artwork from Kirby's Super Star Stacker | |
| Tick-Tock Jr. | Normal | Various | 
|
Tick Tock Jr.'s official artwork from Kirby's Super Star Stacker | |
| Gryll | Rare | Overload Ocean, Stage 2 | 
|
Gryll's official artwork from Kirby's Super Star Stacker | |
| Ribbon | Rare | Overload Ocean, Stage 4 | 
|
Ribbon's official artwork from Kirby 64: The Crystal Shards | |
| Waddle Dee | Normal | Various | 
|
Waddle Dee's official artwork from Kirby 64: The Crystal Shards | |
| Adeleine | Rare | Patched Plains, Stage 4 | 
|
Adeleine's official artwork from Kirby 64: The Crystal Shards | |
| King Dedede | Normal | Various | 
|
King Dedede's official artwork from Kirby 64: The Crystal Shards | |
| Ribbon Icon | Normal | Various | 
|
One of the two icons used in the Ribbon's Crystal Gun Combo Ability in Kirby 64: The Crystal Shards | |
| Crystal Icon | Normal | Various | 
|
One of the icons used in the Ribbon's Crystal Gun Combo Ability in Kirby 64: The Crystal Shards | |
| Kirby | Normal | Various | 
|
Kirby's official artwork from Kirby Tilt 'n' Tumble | |
| Blinkbat | Normal | Various | 
|
Blinkbat's official artwork from Kirby Tilt 'n' Tumble | |
| Orbservors | Normal | Various | 
|
Orbservor's official artwork from Kirby Tilt 'n' Tumble | |
| Swimming Kirby | Normal | Various | 
|
Kirby's official artwork from Kirby: Nightmare in Dream Land | |
| Sir Kibble | Normal | Various | 
|
Sir Kibble's official artwork from Kirby: Nightmare in Dream Land | |
| Chilly | Normal | Various | 
|
Chilly's official artwork from Kirby: Nightmare in Dream Land | |
| Bomber | Normal | Various | 
|
Bomber's official artwork from Kirby: Nightmare in Dream Land | |
| Maxim Tomato | Normal | Various | 
|
Maxim Tomato's official artwork from Kirby: Nightmare in Dream Land | |
| Star Rod | Rare | Gigabyte Grounds, Stage 4 | 
|
Star Rod's official artwork from Kirby: Nightmare in Dream Land | |
| Top Speed | Normal | Various | 
|
Top Speed's in-game sprite from Kirby Air Ride | |
| Charge | Normal | Various | 
|
Charge's in-game sprite from Kirby Air Ride | |
| Turn | Normal | Various | 
|
Turn's in-game sprite from Kirby Air Ride | |
| Fake Weight | Normal | Various | 
|
Fake Weight's in-game sprite from Kirby Air Ride | |
| Dragoon | Rare | Rhythm Route, Stage 2 | 
|
Dragoon's in-game sprite from Kirby Air Ride | |
| Hydra | Rare | Resolution Road, Stage 3 | 
|
Hydra's in-game sprite from Kirby Air Ride | |
| Kirby on the Phone | Normal | Various | 
|
Kirby's official artwork from Kirby & The Amazing Mirror | |
| Mirra | Normal | Various | 
|
Mirra's official artwork from Kirby & The Amazing Mirror | |
| Gobbler | Normal | Various | 
|
Gobbler's official artwork from Kirby & The Amazing Mirror | |
| Master Hand | Normal | Various | 
|
Master Hand's official artwork from Super Smash Bros. | |
| Crazy Hand | Rare | Access Ark, Stage 7 | 
|
Crazy Hand's official artwork from Kirby & The Amazing Mirror | |
| Dark Meta Knight | Rare | Gigabyte Grounds, Stage 5 | 
|
Dark Meta Knight's official artwork from Kirby & The Amazing Mirror | |
| Kirby Ball | Normal | Various | 
|
Kirby's official artwork from Kirby: Canvas Curse | |
| Meta Knight Ball | Normal | Various | 
|
Meta Knight's official artwork from Kirby: Canvas Curse | |
| Dedede Ball | Normal | Various | 
|
King Dedede's official artwork from Kirby: Canvas Curse | |
| Waddle Dee Ball | Normal | Various | 
|
Waddle Dee's official artwork from Kirby: Canvas Curse | |
| Waddle Doo Ball | Normal | Various | 
|
Waddle Doo's official artwork from Kirby: Canvas Curse | |
| Bloon | Normal | Various | 
|
Bloon's official artwork from Kirby: Canvas Curse | |
| Red Para | Normal | Various | 
|
Para Matter's official artwork from Kirby: Canvas Curse | |
| Drawcia | Rare | Gigabyte Grounds, Stage 2 | 
|
Drawcia's official artwork from Kirby: Canvas Curse placed inside a painting frame | |
| Squeaker | Normal | Various | 
|
Squeakers' official artwork from Kirby: Squeak Squad | |
| Storo | Normal | Various | 
|
Storo's official artwork from Kirby: Squeak Squad | |
| Spinni | Normal | Various | 
|
Spinni's official artwork from Kirby: Squeak Squad | |
| Doc | Normal | Various | 
|
Doc's official artwork from Kirby: Squeak Squad | |
| Daroach | Rare | Overload Ocean, Stage 5 | 
|
Daroach's official artwork from Kirby: Squeak Squad | |
| Guarding Kirby | Normal | Various | 
|
Kirby's official artwork from Kirby Super Star Ultra | |
| Knuckle Joe | Normal | Various | 
|
Knuckle Joe's official artwork from Kirby Super Star Ultra | |
| Lololo | Normal | Various | 
|
Lololo's official artwork from Kirby Super Star Ultra | |
| Lalala | Normal | Various | 
|
Lalala's official artwork from Kirby Super Star Ultra | |
| Fire Lion | Normal | Various | 
|
Fire Lion's official artwork from Kirby Super Star Ultra | |
| Sailor Waddle Dee | Rare | Patched Plains, Stage 3 | 
|
Sailor Waddle Dee's official artwork from Kirby Super Star Ultra | |
| Masked Dedede | Rare | Rhythm Route, Stage 5 | 
|
Masked Dedede's official artwork from Kirby Super Star Ultra | |
| Galacta Knight | Rare | Access Ark, Stage 4 | 
|
Galacta Knight's official artwork from Kirby Super Star Ultra | |
| Kirby | Normal | Various | 
|
Kirby's official artwork from Kirby's Epic Yarn | |
| Fluff | Rare | Resolution Road, Stage 2 | 
|
Prince Fluff's official artwork from Kirby's Epic Yarn | |
| Double Kirby | Normal | Various | 
|
The Kirbys' official artwork from Kirby Mass Attack | |
| Beanbon | Normal | Various | 
|
Beanbon's official artwork from Kirby Mass Attack | |
| Skully | Normal | Various | 
|
Skully's official artwork from Kirby Mass Attack | |
| Melon | Normal | Various | 
|
Melon's official artwork from Kirby Mass Attack | |
| Kirby | Normal | Various | 
|
Kirby's head icon from Kirby's Return to Dream Land | |
| King Dedede | Normal | Various | 
|
King Dedede's head icon from Kirby's Return to Dream Land | |
| Meta Knight | Normal | Various | 
|
Meta Knight's head icon from Kirby's Return to Dream Land | |
| Waddle Dee | Normal | Various | 
|
Bandana Waddle Dee's head icon from Kirby's Return to Dream Land | |
| Landia | Normal | Various | 
|
Landia's icon from Kirby's Return to Dream Land | |
| Lor Starcutter | Normal | Various | 
|
The Lor Starcutter's icon from Kirby's Return to Dream Land | |
| Magolor | Rare | Rhythm Route, Stage 3 | 
|
Magolor's icon from Kirby's Dream Collection Special Edition | |
| Ultra Sword | Rare | Patched Plains, Stage 2 | 
|
||
| Kirby (3D Warp Star) | Normal | Various | 
|
3D Warpstar's official artwork from Kirby: Triple Deluxe | |
| Hypernova | Normal | Various | 
|
Hypernova's icon from Kirby: Triple Deluxe | |
| Beetley | Normal | Various | 
|
Beetley's official artwork from Kirby: Triple Deluxe | |
| Ringle | Normal | Various | 
|
Ringle's official artwork from Kirby: Triple Deluxe | |
| People of the Sky | Rare | Overload Ocean, Stage 3 | 
|
||
| Taranza | Rare | Patched Plains, Stage 6 | 
|
||
| Queen Sectonia | Rare | Gigabyte Grounds, Stage 7 | 
|
||
| Deluxe Logo | Normal | Various |  
|
The Z from Dedede's Drum Dash Deluxe's Japanese and Korean logos | |
| King Dedede (Tambourine) | Normal | Various | 
|
King Dedede's official artwork from Dedede's Drum Dash Deluxe | |
| Deluxe Logo | Normal | Various |  
|
The Z from Kirby Fighters Deluxe's Japanese and Korean logos | |
| Team Cannon | Normal | Various | 
|
The Combo Cannon as it appears in Kirby Fighters Deluxe | |
| Kirby | Normal | Various | 
|
Kirby's official artwork from Kirby and the Rainbow Curse | |
| Elline | Normal | Various | 
|
Elline's official artwork from Kirby and the Rainbow Curse | |
| Claycia | Rare | Overload Ocean, Stage 7 | 
|
Claycia's official artwork from Kirby and the Rainbow Curse placed inside a frame | |
| Qbby | Special | Rare | Rhythm Route, Stage 7 | 
|
Qbby's official artwork from BOXBOY! |
| Dream Hatcher | Special | Rare | Access Ark, Stage 8 | 
|
The official HAL Laboratory logo |
Super Kirby Clash
| This section is currently under construction | |
| Name | Source | Image | Price | Quotes | Notes |
|---|---|---|---|---|---|
| Basic 1 | LINE | 
|
N/A | Counting on you! | |
| Basic 2 | LINE | 
|
N/A | Thanks! | |
| Basic 3 | LINE | 
|
N/A | Good Job! | |
| Basic 4 | LINE | 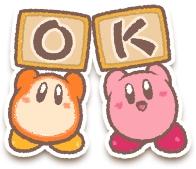
|
N/A | ||
| Basic 5 | LINE | 
|
N/A | Hold on... | |
| Basic 6 | LINE | 
|
N/A | They got me! | |
| Basic 7 | LINE | 
|
N/A | Sorry! | |
| Kirby 1 | 
|
20 | Let's go! | ||
| Kirby 2 | 
|
20 | I'm getting pumped! | ||
| Kirby 3 | 
|
20 | Keep going! | ||
| Kirby 4 | 
|
20 | Here it comes! | ||
| Kirby 5 | 
|
30 | Ha...ha? | ||
| Kirby 6 | Kirby's copy! | 
|
20 | Later! | |
| Kirby 7 | Kirby's copy! | 
|
20 | Nice work. | |
| Kirby 8 | 
|
20 | |||
| Kirby 9 | 
|
20 | Let's go, everyone! | Must be unlocked before purchase. | |
| King Dedede 1 | 
|
20 | Counting on you! | ||
| King Dedede 2 | 
|
20 | I got this! | ||
| King Dedede 3 | 
|
20 | Bye! | ||
| King Dedede 4 | 
|
20 | |||
| King Dedede 5 | 
|
30 | |||
| Meta Knight 1 | 20 | Let us fight! | |||
| Meta Knight 2 | 
|
30 | Sorry for the wait! | ||
| Meta Knight 3 | LINE | 
|
20 | I expected as much... | |
| Meta Knight 4 | 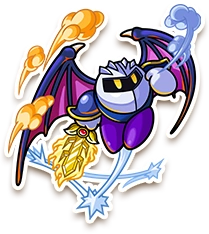
|
20 | Let us meet again! | ||
| Waddle Dee 1 | 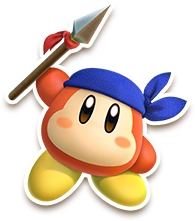
|
20 | Good luck! | ||
| Waddle Dee 2 | 
|
20 | Yay! | ||
| Waddle Dee 3 | 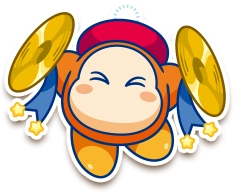
|
20 | Nice! | ||
| Waddle Dee 4 | 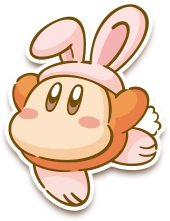
|
30 | Woo! | ||
| Waddle Dee 5 | Kirby's copy! | 
|
20 | Byeee! | |
| Waddle Dee 6 | Kirby 25th Anniversary Twitter | 
|
20 | ||
| Rick & Kine & Coo | 
|
20 | Ta-da! | Must be unlocked before purchase. | |
| Dark Matter | 
|
20 | Wonderful... | Must be unlocked before purchase. | |
| Chef Kawasaki | 
|
20 | Let's get cookin'! | ||
| Dyna Blade | 
|
20 | *flap* | ||
| Galactic Nova | 
|
20 | OK. -> | Must be unlocked before purchase. | |
| Marx | 
|
20 | Hey heyyy! | Must be unlocked before purchase. | |
| Marx Soul | 
|
30 | Ha-HAAA! | Must be unlocked before purchase. | |
| Gooey | 
|
20 | I'm not licked yet! | ||
| Adeleine & Ribbon | 
|
20 | Sorry for the wait! | ||
| Dark Meta Knight | 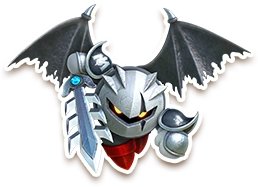
|
20 | Not bad. | ||
| Shadow Kirby | 
|
20 | Bye. | ||
| Daroach | 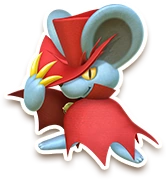
|
20 | Got my eye on you! | Must be unlocked before purchase. | |
| Dark Nebula | 
|
20 | *staaare* | Must be unlocked before purchase. | |
| Magolor | 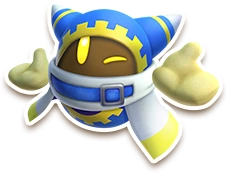
|
20 | See ya! | Must be unlocked before purchase. | |
| Shopkeeper Magolor | 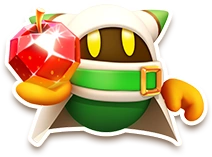
|
30 | Everything I need! | ||
| Taranza | 
|
20 | Pretty good! | ||
| Elline | 
|
20 | Together! | ||
| Susie | 
|
20 | Counting on you! | ||
| Francisca | Kirby 25th Anniversary Twitter | 
|
30 | ...Bonjam. | |
| Flamberge | Kirby 25th Anniversary Twitter | 
|
30 | Fired up! | |
| Zan Partizanne | Kirby 25th Anniversary Twitter | 
|
30 | Purge them! | |
| Hyness | 
|
30 | Juh? | Must be unlocked before purchase. | |
| Nightmare | 
|
50 | Good work. | Must be unlocked before purchase. | |
| Galacta Knight | 
|
50 | Strongest in the galaxy! | Must be unlocked before purchase. |
Rare Sticker Guide (Kirby: Planet Robobot)
Patched Plains
| Stage | Rare Sticker | Image | Guide |
|---|---|---|---|
| Stage 1 | Star Rod Kirby |
|
Defeat Clanky Woods. |
| Stage 2 | Ultra Sword |
|
Behind a couple of logs destroyed with Sword Mode. |
| Stage 3 | Sailor Waddle Dee |
|
Use Robobot Armor from Code Cube room to destroy Durable Block in ceiling before Poppy Bros. Jr. |
| Stage 4 | Adeleine |
|
Destroy block in grate room nearby Galbo. |
| Stage 6 | Taranza |
|
Use Bomb Mode to keep pink Switch activated. |
Resolution Road
| Stage | Rare Sticker | Image | Guide |
|---|---|---|---|
| Stage 1 | Gooey |
|
Use Robobot Armor from ESP puzzle room to unscrew platform where the Battery was previously. |
| Stage 2 | Fluff |
|
Use Missile Salvo/Missile Spread to hit Bomb Block from behind in the second Jet Mode segment. |
| Stage 3 | Hydra |
|
Break through a bunch of Star Blocks past the Electro Spheres. |
| Stage 4 | Marx |
|
Destroy Bomb Block near Spynum to enter pipe leading to the background. Go to the next room and get the Treasure Chest. |
| Stage 6 | "HAL" |
|
Press all Switches during first and second Remote Controller segments. |
Overload Ocean
| Stage | Rare Sticker | Image | Guide |
|---|---|---|---|
| Stage 1 | Kirby |
|
In room with third Code Cube; in the far left area in the background in a crate. |
| Stage 2 | Gryll |
|
After third Code Cube; use 3D Spring Hopper when red storage containers appear in background (before the three Glunks). |
| Stage 3 | People of the Sky |
|
In room with first Robobot Armor, place heavy block on crank platform, move platform to background, and use 3D Warpstar to go into the background; jump onto heavy block to reach higher area; break Durable Blocks. |
| Stage 4 | Ribbon |
|
In optional room with the second Code Cube, destroy Fire Blocks in the bottom left of the hollow square. |
| Stage 5 | Daroach |
|
After defeating Bonkers, use Hammer to pound the stakes beforehand. Enter door and open Treasure Chest in next room. |
| Stage 7 | Claycia |
|
After the first Code Cube, under the boat supporting the door. |
Gigabyte Grounds
| Stage | Rare Sticker | Image | Guide |
|---|---|---|---|
| Stage 1 | Meta Knight Icon |
|
After exiting the pipe in the second roller room, ascend the wall from which the pipe sticks out of. |
| Stage 2 | Drawcia |
|
Using the Robobot Armor from the optional room that contained the first Code Cube, use Stone Mode to push truck to access 3D Warpstar. The Rare Sticker is in a Treasure Chest. |
| Stage 3 | "Pink Ball" Kanji |
|
Use Mirror's Reflect Guard on Gabon's bone to reflect it and hit the blue Switch, releasing the Treasure Chest. |
| Stage 4 | Star Rod |
|
In third Jet Mode segment, hit switch nearby Spynum to unblock the Rare Sticker in the background. Use 3D Warpstar and fly backward. |
| Stage 5 | Dark Meta Knight |
|
Go up shaft after four squeaky hammers. |
| Stage 7 | Queen Sectonia |
|
In the room with the fans and smog, go into the optional room. Defeat Bonkers 2.0 and go through a pipe leading to the background; in plain sight. |
Rhythm Route
| Stage | Rare Sticker | Image | Guide |
|---|---|---|---|
| Stage 1 | King Dedede Icon |
|
In the area with the cars, there is a place with three ladders. Hover above the second one. |
| Stage 2 | Dragoon |
|
Enter through the top of the casino. In the room with Smash Bros., destroy the Star Blocks. The Rare Sticker is to the right. |
| Stage 3 | Magolor |
|
Using Spark/Beam Mode from door puzzle, power wire and use crank to continue current to gate. Behind the gate is a garage door. In the next room, power wire and rotate crank to continue current to gate, but don't rotate too much counterclockwise, as it will pop out, making the circuit impossible to do. |
| Stage 4 | Dark Matter |
|
In the first room, when traveling to the left, travel on the floating platforms by using Speed Burst and 3D Spring Hopper. Inside a few Durable Blocks. |
| Stage 5 | Masked Dedede |
|
Use Stone Mode to push around trucks. One of them is blocking the Rare Sticker. |
| Stage 7 | Qbby |
|
In billiards area, travel all the way to the right before climbing the ladder. |
Access Ark
| Stage | Rare Sticker | Image | Guide |
|---|---|---|---|
| Stage 1 | Haltmann Works. Co Logo |
|
In room with tubes, go to bottom tube in area with NESP. |
| Stage 2 | Nightmare Wizard |
|
In the room with the Tilt Gondolas, there is a hole in the ceiling. Hovering up to it reveals the Rare Sticker. |
| Stage 3 | Zero |
|
Slice the chain on the catapult without using the crank. |
| Stage 4 | Galacta Knight |
|
After fighting Security Force, skip the door, as Push Blocks will appear above. Hover up and go into the background. Go to the beginning of the room. |
| Stage 5 | Susie |
|
In room with Cannons after Jet Mode crash, hover above to find a Sticker. Hover above that and enter secret area from star. When at split path, make Cannon go all the way to the left, past the Blue Point Star. |
| Stage 7 | Crazy Hand |
|
In underwater segment, after the Barbar with Red Point Star, swim upward. |
| Stage 8 | Dream Hatcher |
|
Enter the moon after pressing a Switch. Unscrew left-most screw in the foreground. |
Rare Completion Sticker
| Stage | Rare Sticker | Image | Guide |
|---|---|---|---|
| N/A | President Haltmann |
|
All Code Cubes Collected |
Mistakes (Kirby: Planet Robobot)
- Kirby Tilt 'n' Tumble is spelled "Kirby's Tilt 'N Tumble" in all descriptions.
- Kirby: Canvas Curse and Kirby: Squeak Squad are missing their colons in all descriptions.
- Despite debuting in Kirby's Super Star Stacker, Gryll is listed as appearing in Kirby's Star Stacker. This may be because Kirby's Super Star Stacker was never released outside of Japan, along with that the Japanese names for Kirby's Star Stacker and Kirby's Super Star Stacker are the same.
Related Quotes
| “ | Stickers you collect and clear the stage with will appear in the Sticker Room.” |
| — Instruction manual • Kirby: Planet Robobot |
| “ | You don't have any stickers yet. Find them in the stages!” |
| — Description • Kirby: Planet Robobot |
Trivia
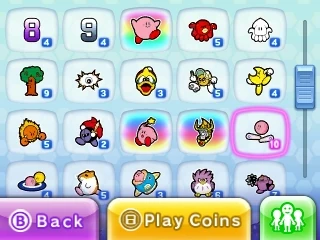

- When the player collects ten or more of one sticker in Kirby: Planet Robobot, the color of the number and of the glow that surrounds the sticker when it is selected in the Sticker Room turns from blue to purple. This is the maximum number the player can collect of each sticker.
- Stickers were designed to resemble the keychain items from Kirby: Triple Deluxe, as both serve as unique collectibles.


- Stickers appear hidden throughout the levels in the Kirby 3D Rumble sub-game, much in the same way keychains appear throughout Kirby Fighters Deluxe and Dedede's Drum Dash Deluxe. This feature carries over to Kirby's Blowout Blast as well. Most of these stickers are found by turning the camera with the C-Stick present on New Nintendo 3DS and 2DS models.
- The doodles of various Kirby characters may be inspired by the Kirby: Right Back at Ya! episode Cartoon Buffoon, where the residents of Cappy Town are shown to have poor drawing skills when drawing several of the series's staple characters.
- If the player does not have two or more of a sticker in Kirby: Planet Robobot, it cannot be applied to both sides of the Robobot Armor. While this makes sense logically, it makes having one type of rare sticker on both sides of the Robobot Armor nearly impossible; this can only be achieved by receiving a rare sticker through StreetPass.
Artwork
")
Gallery
")
")
")
")