SuperMK411 (talk | contribs) (→Trivia: About the theme) Tag: Visual edit |
LinkTheLefty (talk | contribs) mNo edit summary |
||
| (11 intermediate revisions by 6 users not shown) | |||
| Line 3: | Line 3: | ||
|image = [[File:KTD_Royal_Road.png]] |
|image = [[File:KTD_Royal_Road.png]] |
||
|caption = ''[[Kirby: Triple Deluxe]]'' screenshot |
|caption = ''[[Kirby: Triple Deluxe]]'' screenshot |
||
| − | |jap_name = ロイヤル ロード(Roiyaru |
+ | |jap_name = ロイヤル ロード (Roiyaru Rōdo) |
| − | |jap_meaning = Royal Road |
+ | |jap_meaning = Royal Road <br> ロイヤル = Royal, ロード = Road |
|world = {{LevelSequence|KTD|6}} |
|world = {{LevelSequence|KTD|6}} |
||
|theme = Castle, crystal |
|theme = Castle, crystal |
||
|boss = [[Flowery Woods]], [[Paintra]], [[Kracko]], [[Coily Rattler]], [[Pyribbit]], [[Masked Dedede]]/Masked Dedede's Revenge, [[Queen Sectonia]], [[Shadow Dedede]], [[Dark Meta Knight|Dark Meta Knight's Revenge]] |
|boss = [[Flowery Woods]], [[Paintra]], [[Kracko]], [[Coily Rattler]], [[Pyribbit]], [[Masked Dedede]]/Masked Dedede's Revenge, [[Queen Sectonia]], [[Shadow Dedede]], [[Dark Meta Knight|Dark Meta Knight's Revenge]] |
||
| − | |common enemies = [[Antler]], [[Beetley]], [[Big Missile]], [[Big Waddle Dee]], [[Birdon]], [[Blade Knight |
+ | |common enemies = [[Antler]], [[Beetley]], [[Big Missile]], [[Big Waddle Dee]], [[Birdon]], [[Blade Knight]], [[Cannon Tower]], [[Chilly]], [[Chip]], [[Clown Acrobot]], [[Flame Cobra]], [[Flamer]], [[Gigant Chicks]], [[Gigatzo]], [[Hot Head]], [[Hunter Scarfy]], [[King Foorlowber]], [[Knuckle Joe]], [[Land Barbar]], [[Leafan]], [[Mamanti]], [[Moonja]], [[Mowlee Bros.]], [[Mumbies]], [[Noddy]], [[Pacto]], [[Parasol (enemy)|Parasol]], [[Parasol Waddle Dee]], [[Pipe Worm]], [[Poppy Bros. Jr.]], [[Ringle]], [[Rocky]], [[Scarfy]], [[Searches]], [[Bronto Burt#Kirby: Triple Deluxe and Kirby: Planet Robobot|Sectra Burt]], [[Waddle Dee#Sectra Dee|Sectra Dee]], [[Gordo#Kirby: Triple Deluxe|Sectra Gordo]], [[Lanzer#Kirby: Triple Deluxe|Sectra Knight]], [[Spynum|Sectra Shooter]], [[Shotzo]], [[Sir Kibble]], [[Slide Laser Robot]], [[Sparky]], [[Springy Hand]], [[Tick]], [[Waddle Dee Steel Fortress]], [[Waddle Dee Train]], [[Waddle Doo]], [[Walky]], [[Wheelie]], [[Whippy (enemy)|Whippy]], [[Winged Eggers]] |
| − | |mini-boss = [[Gigant Edge]], [[Bonkers]], [[Flame Galboros|Flame Galboros DX]], [[Blocky|Blocky DX]], [[Mr. Frosty|Mr. Frosty DX]], [[Bonkers|Bonkers DX]], [[Gigant Edge|Gigant Edge DX]], [[Grand Wheelie|Grand Wheelie DX]], [[Hornhead|Hornhead DX]]}} |
+ | |mini-boss = [[Gigant Edge]], [[Bonkers]], [[Flame Galboros|Flame Galboros DX]], [[Blocky|Blocky DX]], [[Mr. Frosty|Mr. Frosty DX]], [[Bonkers|Bonkers DX]], [[Gigant Edge|Gigant Edge DX]], [[Grand Wheelie|Grand Wheelie DX]], [[Hornhead|Hornhead DX]]}}'''Royal Road''' is the sixth and final floating island of [[Floralia]] and serves as the sixth level in ''[[Kirby: Triple Deluxe]]''. |
| − | '''Royal Road''' is the sixth and final floating island of [[Floralia]] and serves as the sixth level in ''[[Kirby: Triple Deluxe]]''. |
||
==General Information== |
==General Information== |
||
| Line 59: | Line 58: | ||
==[[Sun Stone]]== |
==[[Sun Stone]]== |
||
===Stage 1=== |
===Stage 1=== |
||
| − | #In the room with the [[Lollipop Tank]], there's a ladder below the floor. Climbing down it will lead to an alcove with a couple of [[Container| |
+ | #In the room with the [[Lollipop Tank]], there's a ladder below the floor. Climbing down it will lead to an alcove with a couple of [[Container|barrels]]. |
| − | #In the room with [[Cannon]]s, there's an area on the ceiling without spikes. Shoot it. Move both 8-ton weights to the far right. Then, move them back to the left to that only the top weight is above the left [[Durable Block]]. Use [[Sword]] from [[Gigant Edge]] or [[Beetle]] from the [[HAL Room]] to cut the rope of the top 8-ton weight. Use the [[3D |
+ | #In the room with [[Cannon]]s, there's an area on the ceiling without spikes. Shoot it. Move both 8-ton weights to the far right. Then, move them back to the left to that only the top weight is above the left [[Durable Block]]. Use [[Sword]] from [[Gigant Edge]] or [[Beetle]] from the [[HAL Room]] to cut the rope of the top 8-ton weight. Use the [[3D Warp Star]] to go into the foreground to press the [[switch]], opening the [[gate]] above the second Durable Block. Move the remaining weight to the far right and cut the rope. |
| − | #Fall through the soft platform in the second room with the Waddle Dee Tank. Destroy the [[Bomb Block]], as it will get rid of the platform beneath the tank. Destroy the Bomb Block preventing further progress. Destroy the barrel to find a 3D |
+ | #Fall through the soft platform in the second room with the Waddle Dee Tank. Destroy the [[Bomb Block]], as it will get rid of the platform beneath the tank. Destroy the Bomb Block preventing further progress. Destroy the barrel to find a 3D Warp Star. Take it to the background to retrieve the [[Treasure Chest]]. |
===Stage 2=== |
===Stage 2=== |
||
#In the room after fighting [[Coily Rattler]], there is an optional room. Use the [[Tilt Bowl]] to cause the flowers to bloom. The right flower releases a [[Key]], the left flower releases a red [[Star]] and serves as a platform. |
#In the room after fighting [[Coily Rattler]], there is an optional room. Use the [[Tilt Bowl]] to cause the flowers to bloom. The right flower releases a [[Key]], the left flower releases a red [[Star]] and serves as a platform. |
||
| Line 67: | Line 66: | ||
#Match the heads to the husband and wife snowmen. |
#Match the heads to the husband and wife snowmen. |
||
#Inhale the [[Treasure Chest]] using through the [[Magic Tube]]. |
#Inhale the [[Treasure Chest]] using through the [[Magic Tube]]. |
||
| − | #In the room with the [[Cannon Tower]]s, there's a ladder in the area with the second Cannon Tower. Hover and climb up the ladder for another Cannon Tower that has an optional door. In the optional room, move the [[ |
+ | #In the room with the [[Cannon Tower]]s, there's a ladder in the area with the second Cannon Tower. Hover and climb up the ladder for another Cannon Tower that has an optional door. In the optional room, move the [[Slide Laser Robot]] under the ice below the toy truck. Move the truck into the pit. Pull the Slide Laser Robot so that it's under the block of ice containing the Sun Stone. Pull on the purple [[switch]] once the ice has melted in order to safely collect the Sun Stone. |
===Stage 4=== |
===Stage 4=== |
||
#In the room after fighting [[Flowery Woods]], skip the [[Warp Hole]] and continue going to the left. |
#In the room after fighting [[Flowery Woods]], skip the [[Warp Hole]] and continue going to the left. |
||
| Line 73: | Line 72: | ||
#After taking the top-right Warp Hole, hit all of the switches and destroy all of the Durable Blocks with the [[3D Helmet Cannon]] in order to get the [[Key]] to the locked door. |
#After taking the top-right Warp Hole, hit all of the switches and destroy all of the Durable Blocks with the [[3D Helmet Cannon]] in order to get the [[Key]] to the locked door. |
||
#After taking the top-left Warp Hole, enter the optional room in the background with [[Hammer]] from [[Bonkers]]. Use Hammer Flip to light the fuse. Move the blocks to keep the spark going. |
#After taking the top-left Warp Hole, enter the optional room in the background with [[Hammer]] from [[Bonkers]]. Use Hammer Flip to light the fuse. Move the blocks to keep the spark going. |
||
| − | #Take the 3D |
+ | #Take the 3D Warp Star that appears after defeating [[Mr. Frosty]] DX. |
| − | #Take the 3D |
+ | #Take the 3D Warp Star that appears after defeating the three [[Grand Wheelie]] DXs. Keep moving to the left. |
===Stage 7=== |
===Stage 7=== |
||
#User [[Circus]]'s Fire-Hoop Jump to melt the [[Ice Block]]s below the [[Springy Hand]]s, allowing access to an optional room. Grab the Sun Stone quickly, but also melt the Ice Blocks below using Circus or [[Fire]]. |
#User [[Circus]]'s Fire-Hoop Jump to melt the [[Ice Block]]s below the [[Springy Hand]]s, allowing access to an optional room. Grab the Sun Stone quickly, but also melt the Ice Blocks below using Circus or [[Fire]]. |
||
| Line 82: | Line 81: | ||
#To the top left of the end door; in plain sight. |
#To the top left of the end door; in plain sight. |
||
| + | ==Music== |
||
| ⚫ | |||
| + | {{db|Template:PortalRA06/Core}} |
||
| + | {{PortalRA06/Core/KTD_-_Moonlight_Capital}} |
||
| + | |||
| ⚫ | |||
{|class="wikitable" |
{|class="wikitable" |
||
!Stage |
!Stage |
||
| Line 126: | Line 129: | ||
==Trivia== |
==Trivia== |
||
| − | *Stage 5 is the only non-bonus stage in the whole game to contain [[Mid-boss|DX mid- |
+ | *Stage 5 is the only non-bonus stage in the whole game to contain [[Mid-boss|DX mid-bosses]]. |
**Royal Road is also the only level to have two bonus stages, with one being dedicated to the [[Hypernova]] ability entirely. |
**Royal Road is also the only level to have two bonus stages, with one being dedicated to the [[Hypernova]] ability entirely. |
||
*The floors and walls in Stages 2 and 4 heavily resemble those seen in ''[[Kirby: Canvas Curse]]''’s [[Spectacle Space]]. |
*The floors and walls in Stages 2 and 4 heavily resemble those seen in ''[[Kirby: Canvas Curse]]''’s [[Spectacle Space]]. |
||
| Line 132: | Line 135: | ||
*A remix of the [[Fountain of Dreams]]'s music from ''[[Super Smash Bros. Melee]]'' plays during the Hypernova section of Stage 8. |
*A remix of the [[Fountain of Dreams]]'s music from ''[[Super Smash Bros. Melee]]'' plays during the Hypernova section of Stage 8. |
||
*Stage 7 features the music tracks "The Adventure Begins," "Infinite Power," "Looming Darkness," and "Sky Waltz," all of which are reused from ''[[Kirby's Return to Dream Land]]''. |
*Stage 7 features the music tracks "The Adventure Begins," "Infinite Power," "Looming Darkness," and "Sky Waltz," all of which are reused from ''[[Kirby's Return to Dream Land]]''. |
||
| + | <gallery type="slideshow"> |
||
| ⚫ | |||
| + | KSA L5 Royal Road 1.jpg|Stage 1 |
||
| + | KSA L5 Royal Road 2.jpg|Stage 1 |
||
| + | KSA L5 Royal Road 3.jpg|Stage 1 |
||
| + | KSA L5 Royal Road 4.jpg|Stage 1 |
||
| + | KSA L5 Royal Road 5.jpg|Stage 5 |
||
| + | KSA L5 Royal Road 6.jpg|Stage 5 |
||
| + | KSA L5 Royal Road 7.jpg|Stage 5 |
||
| + | KSA L5 Royal Road 8.jpg|Stage 5 |
||
| + | KSA L5 Royal Road 9.jpg|Stage 5 |
||
| + | KSA L5 Royal Road 10.jpg|Stage 5 |
||
| + | KSA L5 Royal Road 11.jpg|Stage 5 |
||
| + | KSA L5 Royal Road 12.jpg|Stage 5 |
||
| + | KSA L5 Royal Road 13.jpg|Stage 5 |
||
| + | </gallery> |
||
| + | *In ''[[Kirby Star Allies]]'', when playing the [[Guest Star ???? Star Allies Go!]] [[sub-game]] as [[Taranza]], some stage layout in Level 5 is changed to reflect Stages 1 and 5 of from ''Kirby: Triple Deluxe''. |
||
| ⚫ | |||
==Gallery== |
==Gallery== |
||
Revision as of 14:03, 11 December 2019
Royal Road is the sixth and final floating island of Floralia and serves as the sixth level in Kirby: Triple Deluxe.
General Information
Royal Road is the home of the regal Queen Sectonia, Taranza, and many insect variants of previously-seen enemies. Sectonia's castle is both medieval and technologically advanced. Multiple stages are made up of locations and settings from previous levels connected by Warp Holes. Here, Kirby rescues the People of the Sky, rescues King Dedede from Taranza's clutches, and battles Floralia's tyrant head-on. Seven Sun Stones are required to open the boss stage.
Each boss is fought again across two separate stages. This time, however, they switch up their tactics, using moves usually only reserved for when they have low health. In essence, their movesets closely resemble those of their DX versions.
While this is not the final level in Story Mode, it is in Dededetour. Hanging on Sectonia's wall is the Dimension Mirror which beckons to Shadow Dedede and the evil Dark Meta Knight. Dedede must defeat these villains to complete the sub-game.
The game's last two HAL rooms can be found in Stages 1 and 5. After defeating Gigant Edge in Stage 1, Kirby can fly up into the sky and enter the moon like a door (harkening back to Bubbly Clouds from Kirby's Dream Land). This leads the hero to the HAL Room. In Stage 5, Kirby must wait 86 seconds in the room with the 5x5 3D Securitron blocks. After the time is up, the blocks retract and push out each time with a letter from the word HAL. A door will then appear on the bottom of the screen, leading to a room with Tilt Gondolas and items.
Copy Abilities
Every Copy Ability in the game can be found here.
Archer |
Beam |
Beetle |
Bell |
Bomb |
Circus |
Crash |
Cutter |
Fighter |
Fire |
Hammer |
 Hypernova |
Ice |
Leaf |
Mike |
Needle |
Ninja |
Parasol |
Sleep |
Spark |
Spear |
Stone |
Sword |
Wheel |
Whip |
Wing |
Sun Stone
Stage 1
- In the room with the Lollipop Tank, there's a ladder below the floor. Climbing down it will lead to an alcove with a couple of barrels.
- In the room with Cannons, there's an area on the ceiling without spikes. Shoot it. Move both 8-ton weights to the far right. Then, move them back to the left to that only the top weight is above the left Durable Block. Use Sword from Gigant Edge or Beetle from the HAL Room to cut the rope of the top 8-ton weight. Use the 3D Warp Star to go into the foreground to press the switch, opening the gate above the second Durable Block. Move the remaining weight to the far right and cut the rope.
- Fall through the soft platform in the second room with the Waddle Dee Tank. Destroy the Bomb Block, as it will get rid of the platform beneath the tank. Destroy the Bomb Block preventing further progress. Destroy the barrel to find a 3D Warp Star. Take it to the background to retrieve the Treasure Chest.
Stage 2
- In the room after fighting Coily Rattler, there is an optional room. Use the Tilt Bowl to cause the flowers to bloom. The right flower releases a Key, the left flower releases a red Star and serves as a platform.
Stage 3
- Match the heads to the husband and wife snowmen.
- Inhale the Treasure Chest using through the Magic Tube.
- In the room with the Cannon Towers, there's a ladder in the area with the second Cannon Tower. Hover and climb up the ladder for another Cannon Tower that has an optional door. In the optional room, move the Slide Laser Robot under the ice below the toy truck. Move the truck into the pit. Pull the Slide Laser Robot so that it's under the block of ice containing the Sun Stone. Pull on the purple switch once the ice has melted in order to safely collect the Sun Stone.
Stage 4
- In the room after fighting Flowery Woods, skip the Warp Hole and continue going to the left.
Stage 5
- After taking the top-right Warp Hole, hit all of the switches and destroy all of the Durable Blocks with the 3D Helmet Cannon in order to get the Key to the locked door.
- After taking the top-left Warp Hole, enter the optional room in the background with Hammer from Bonkers. Use Hammer Flip to light the fuse. Move the blocks to keep the spark going.
- Take the 3D Warp Star that appears after defeating Mr. Frosty DX.
- Take the 3D Warp Star that appears after defeating the three Grand Wheelie DXs. Keep moving to the left.
Stage 7
- User Circus's Fire-Hoop Jump to melt the Ice Blocks below the Springy Hands, allowing access to an optional room. Grab the Sun Stone quickly, but also melt the Ice Blocks below using Circus or Fire.
- Use the second Timed Dynamite to destroy the Durable Block. Enter the optional room. Use the 3D Laser Bar to destroy the Durable Blocks, but not the regular ones. Open the Treasure Chest.
- In Treasure Chest after defeating Hornhead DX and Gigant Edge DX.
Stage 8
- To the top left of the end door; in plain sight.
Music
| The following section contains transcluded content from the Database. Source: (view • edit • help) |
| KTD - Moonlight Capital | ||||||||||||||||||||||||
|---|---|---|---|---|---|---|---|---|---|---|---|---|---|---|---|---|---|---|---|---|---|---|---|---|

| ||||||||||||||||||||||||
Rare keychains
| Stage | Rare keychain | Image | Guide |
|---|---|---|---|
| Stage 1 | Galacta Knight | 
|
After obtaining the third Sun Stone, continue moving to the left. To the left of the pit where the Lollipop Tank fell, there is a hole in the wall. |
| Stage 2 | Dark Mind | 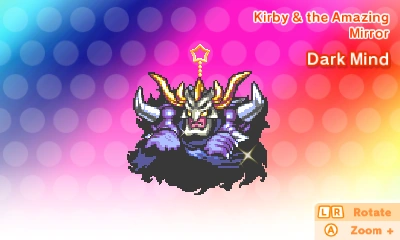
|
In the background in the left pit of the Kracko fight. Do not defeat Kracko before going into the background. The rare keychain can be retrieved during or after the fight, but it is recommended to be done after the fight, as falling into the pit will send Kirby back onto a nearby platform. |
| Stage 3 | Sweet Stuff Drawing | 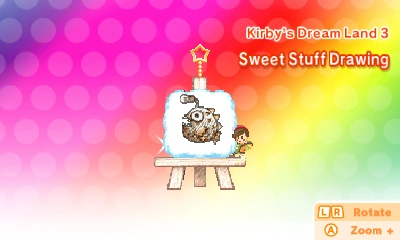
|
In the second room with wrecking balls, pull the first one back partway, so that it will only knock the wall over. Pull the second one back all the way as to obliterate the next wall. Take the downward path. Inhale the left Waddle Dee Train. |
| Stage 4 | King Dedede Painting | 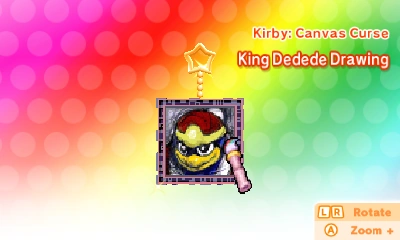
|
In the room after fighting Pyribbit, go to the top left to find a Terrain Block. Destroy it and get in the Cannon. |
| Stage 5 | Golden Egg Statue | 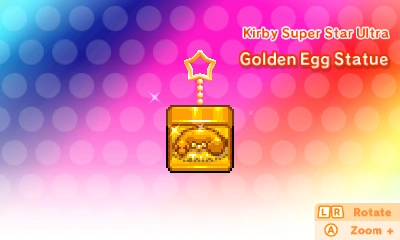
|
Using Hammer from Bonkers after taking the top-left Warp Hole, enter the bottom-right Warp Hole. Pound the Stake and then hover below the platform which the stake was on. |
| Stage 7 | Magolor | 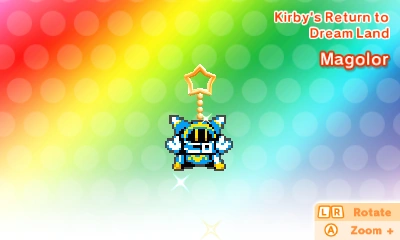
|
Use Fire or Circus to melt the Ice Blocks to obtain a Key. After bringing the Key to the locked door, use Ice from Chilly to douse the Fire Blocks. |
| Stage 8 | Taranza | 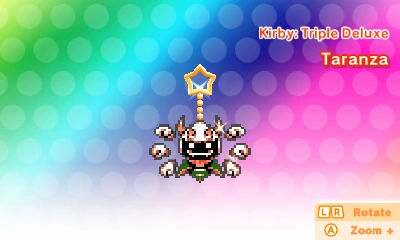
|
Enter the moon on the banner. |
Trivia
- Stage 5 is the only non-bonus stage in the whole game to contain DX mid-bosses.
- Royal Road is also the only level to have two bonus stages, with one being dedicated to the Hypernova ability entirely.
- The floors and walls in Stages 2 and 4 heavily resemble those seen in Kirby: Canvas Curse’s Spectacle Space.
- In Stage 8, Hypernova Kirby is tasked with unfurling a banner at the end of the stage. It features images of Kirby from past games lined up, ending with Hypernova. At the end of the banner is an animated picture of King Dedede and Kirby in Bubbly Clouds. Dedede pounds the ground with his hammer, and the pair jumps in the air. The goal door and a Sun Stone can be found at the end of the banner, as well as a moon image that acts as a door. Taranza's keychain can be found in the secret area after the player descends in a long fall collecting food.
- A remix of the Fountain of Dreams's music from Super Smash Bros. Melee plays during the Hypernova section of Stage 8.
- Stage 7 features the music tracks "The Adventure Begins," "Infinite Power," "Looming Darkness," and "Sky Waltz," all of which are reused from Kirby's Return to Dream Land.


- In Kirby Star Allies, when playing the Guest Star ???? Star Allies Go! sub-game as Taranza, some stage layout in Level 5 is changed to reflect Stages 1 and 5 of from Kirby: Triple Deluxe.
- "Beautiful Prison," the theme of Stage 5, is part of the medley that plays in Heroes in Another Dimension.
Gallery
")
")
")
")
")
")
")
")
")
")