No edit summary Tag: rte-source |
(Undo revision 325947 by Giselle Vallario (talk) That's not really trivia-worthy. It's kind of obvious what they look like.) |
||
| (42 intermediate revisions by 11 users not shown) | |||
| Line 1: | Line 1: | ||
{{Level-infobox |
{{Level-infobox |
||
| − | |image = [[File:KPR_Map_3.jpg |
+ | |image = [[File:KPR_Map_3.jpg]] |
|caption = ''[[Kirby: Planet Robobot]]'' screenshot |
|caption = ''[[Kirby: Planet Robobot]]'' screenshot |
||
| + | |jap_name = オクターン オーシャン (Okutān Ōshan) |
||
| ⚫ | |||
| + | |jap_meaning = Octarn Ocean <br> オクターン = Octarn, オーシャン = Ocean |
||
| ⚫ | |||
|world = {{LevelSequence|KPR|3}} |
|world = {{LevelSequence|KPR|3}} |
||
|boss = [[Susie]] |
|boss = [[Susie]] |
||
|mini-boss = [[Blocky]], [[Bonkers]], [[King Doo|King Doo 2.0]] |
|mini-boss = [[Blocky]], [[Bonkers]], [[King Doo|King Doo 2.0]] |
||
| − | |common enemies = |
+ | |common enemies = [[Big Waddle Dee]], [[Blade Knight]], [[Blipper]], [[Broom Hatter]], [[Cappy]], [[Chemitory]], [[Chilly]], [[Chip]], [[Covered Looker]], [[Craby]], [[Elec]], [[Flamer]], [[Foley]], [[Gordo]], [[Glunk]], [[Hot Head]], [[Capsule J3]], [[Knuckle Joe]], [[Labotory]], [[Leafan]], [[Mamanti]], [[Mech Acro]], [[Mech Flotzo]], [[Moonja]], [[NESP]], [[Noddy]], [[Parasol (enemy)|Parasol]], [[Parasol Waddle Dee]], [[Propeller]], [[Rocky]], [[Scarfy]], [[Sheld]], [[Simirror]], [[Sir Kibble]], [[Sparky]], [[Squishy]], [[Venog]], [[Waddle Dee]], [[Waddle Doo]], [[Walf]], [[Walker Dee]], [[Walky]], [[Wheelie]] |
}} |
}} |
||
| − | '''Overload Ocean''' is a mechanized ocean on [[Planet Popstar]] and serves as the third level |
+ | '''Overload Ocean''' is a mechanized ocean on [[Planet Popstar]] and serves as the third level of ''[[Kirby: Planet Robobot]]''. |
==General Information== |
==General Information== |
||
| Line 15: | Line 17: | ||
By collecting at least six of the 15 [[Code Cube]]s scattered throughout Overload Ocean, Kirby disables the firewall protecting the boss. He then meets and fights [[Susie]]. |
By collecting at least six of the 15 [[Code Cube]]s scattered throughout Overload Ocean, Kirby disables the firewall protecting the boss. He then meets and fights [[Susie]]. |
||
| − | ==[[ |
+ | ==[[Copy Abilities]]== |
| + | {| class="wikitable" cellpadding="0" cellspacing="0" style="width: 600px; text-align: center;" |
||
| − | *[[Beam]] |
||
| + | |[[File:KTD Beam icon.png|link=Beam]]<br />[[Beam]] |
||
| − | *[[Bomb]] |
||
| + | |[[File:KTD Bomb icon.png|link=Bomb]]<br />[[Bomb]] |
||
| − | *[[Cutter]] |
||
| + | |[[File:KTD Cutter icon.png|link=Cutter]]<br />[[Cutter]] |
||
| − | *[[Doctor]] |
||
| + | |[[File:KPR Doctor icon.png|link=Doctor]]<br />[[Doctor]] |
||
| − | *[[ESP]] |
||
| + | |[[File:KPR ESP icon.png|link=ESP]]<br />[[ESP]] |
||
| − | *[[Fighter]] |
||
| + | |} |
||
| − | *[[Fire]] |
||
| + | {| class="wikitable" cellpadding="0" cellspacing="0" style="width: 600px; text-align: center;" |
||
| − | *[[Hammer]] |
||
| + | |[[File:KTD Fighter icon.png|link=Fighter]]<br />[[Fighter]] |
||
| − | *[[Ice]] |
||
| + | |[[File:KTD Fire icon.png|link=Fire]]<br />[[Fire]] |
||
| − | *[[Jet]] |
||
| + | |[[File:KTD Hammer icon.png|link=Hammer]]<br />[[Hammer]] |
||
| − | *[[Leaf]] |
||
| + | |[[File:KTD Ice icon.png|link=Ice]]<br />[[Ice]] |
||
| − | *[[Mike]] |
||
| + | |[[File:KPR Jet icon.png|link=Jet]]<br />[[Jet]] |
||
| − | *[[Mirror]] |
||
| + | |[[File:KTD Leaf icon.png|link=Leaf]]<br />[[Leaf]] |
||
| − | *[[Ninja]] |
||
| + | |- |
||
| − | *[[Parasol]] |
||
| + | |[[File:KTD Mike icon.png|link=Mike]]<br />[[Mike]] |
||
| − | *[[Poison]] |
||
| + | |[[File:KPR Mirror icon.png|link=Mirror]]<br />[[Mirror]] |
||
| − | *[[Sleep]] |
||
| + | |[[File:KTD Ninja icon.png|link=Ninja]]<br />[[Ninja]] |
||
| − | *[[Smash Bros.]] |
||
| + | |[[File:KTD Parasol icon.png|link=Parasol]]<br />[[Parasol]] |
||
| − | *[[Spark]] |
||
| + | |[[File:KPR Poison icon.png|link=Poison]]<br />[[Poison]] |
||
| − | *[[Stone]] |
||
| + | |[[File:KTD Sleep icon.png|link=Sleep]]<br />[[Sleep]] |
||
| − | *[[Sword]] |
||
| + | |} |
||
| − | *[[Wheel]] |
||
| + | {| class="wikitable" cellpadding="0" cellspacing="0" style="width: 600px; text-align: center;" |
||
| + | |[[File:KPR SmashBros icon.png|link=Smash Bros.]]<br />[[Smash Bros.]] |
||
| + | |[[File:KTD Spark icon.png|link=Spark]]<br />[[Spark]] |
||
| + | |[[File:KTD Stone icon.png|link=Stone]]<br />[[Stone]] |
||
| + | |[[File:KTD Sword icon.png|link=Sword]]<br />[[Sword]] |
||
| + | |[[File:KTD Wheel icon.png|link=Wheel]]<br />[[Wheel]] |
||
| + | |} |
||
==Robobot Abilities== |
==Robobot Abilities== |
||
| + | {| class="wikitable" cellpadding="0" cellspacing="0" style="width: 600px; text-align: center;" |
||
| − | *Beam Mode |
||
| + | |[[File:KPR Pause Beam Robobot artwork.png|100px|link=Beam]]<br />[[Beam|Beam Mode]] |
||
| − | *Bomb Mode |
||
| + | |[[File:KPR Pause Bomb Robobot artwork.png|100px|link=Bomb]]<br />[[Bomb|Bomb Mode]] |
||
| − | *ESP Mode |
||
| + | |[[File:KPR Pause ESP Robobot artwork.png|100px|link=ESP]]<br />[[ESP|ESP Mode]] |
||
| − | *Fire Mode |
||
| + | |- |
||
| − | *Ice Mode |
||
| + | |[[File:KPR Pause Fire Robobot artwork.png|100px|link=Fire]]<br />[[Fire|Fire Mode]] |
||
| − | *Parasol Mode |
||
| + | |[[File:KPR Pause Ice Robobot artwork.png|100px|link=Ice]]<br />[[Ice|Ice Mode]] |
||
| − | *Spark Mode |
||
| + | |[[File:KPR Pause Parasol Robobot artwork.png|100px|link=Parasol]]<br />[[Parasol|Parasol Mode]] |
||
| − | *Sword Mode |
||
| + | |- |
||
| − | *Wheel Mode |
||
| + | |[[File:KPR Pause Spark Robobot artwork.png|100px|link=Spark]]<br />[[Spark|Spark Mode]] |
||
| + | |[[File:KPR Pause Sword Robobot artwork.png|100px|link=Sword]]<br />[[Sword|Sword Mode]] |
||
| + | |[[File:KPR Pause Wheel Robobot artwork.png|100px|link=Wheel]]<br />[[Wheel|Wheel Mode]] |
||
| + | |} |
||
| − | ==[[ |
+ | ==[[Code Cube]]s== |
| − | + | ===Stage 1=== |
|
| + | #Destroy the [[Bomb Block]] in the sloping room after [[Blocky]]. |
||
| ⚫ | |||
| + | #Place [[Cannon]] on left fuse. Use [[Fire]] Mode to light fuse. |
||
| ⚫ | |||
| + | #Break [[Durable Block]]s with [[Robobot Armor]] near [[Docking Station]]. Go underwater and take the pipe to the left to the background. |
||
| ⚫ | |||
| + | |||
| ⚫ | |||
| − | + | ===Stage 2=== |
|
| + | #3D Spring Hopper during first [[Wheel]] Mode segment; parallels [[Glunk]]; in plain sight. |
||
| + | #In optional room after second Wheel Mode segment. |
||
| + | #Jump near end of third Wheel Mode segment. |
||
| + | |||
| + | ===Stage 3=== |
||
| + | #Follow the correct path as displayed by the screen in the background: ride [[3D Warp Star]], skip 3D Warp Star, ride 3D Warp Star. |
||
| + | #Use [[crank]] to move platform to destroy [[Star Block]]s underneath [[Treasure Chest]]. |
||
| + | #Press all [[switch]]es in autoscrolling room. |
||
| + | |||
| + | ===Stage 4=== |
||
| + | #Near the end of the room with [[Invincible Candy]]. Underneath the door. |
||
| + | #In the next room, use [[Ice]]/[[Parasol]] to douse and destroy [[Fire Block]]s. Enter the optional room. Douse Fire Blocks to access [[Battery]] to activate [[Swap Chamber]]. |
||
| + | #Place head on third snowman. |
||
| + | |||
| + | ===Stage 5=== |
||
| + | #In optional room in second room, catch the [[Battery]] and use on the Swap Chamber. |
||
| + | #In room with Rare [[Sticker]]/after [[Bonkers]], destroy blocks on the right of the room and pound the [[stake]]. Travel into the foreground and locate the Code Cube. |
||
| + | #In the next room, catch the Battery near the end of the room and use it on Swap Chamber. |
||
| + | |||
| + | ===Stage 7=== |
||
| + | #Carry the [[Battery]] to the Swap Chamber to access the optional room. Use [[ESP]] to power lower wire to open upper gate. |
||
| + | #Use [[Ice]] Mode to freeze water spouts. Carry wire block to the rest of the wire. Use [[Spark]] Mode to power wire to open the gate. |
||
| + | #In Treasure Chest after defeating [[King Doo]] 2.0. |
||
| + | |||
| + | ==[[Sticker|Rare stickers]]== |
||
| + | {|class="wikitable" |
||
| + | !Stage |
||
| + | !Rare Sticker |
||
| + | !Image |
||
| + | !Guide |
||
| + | |- |
||
| + | |Stage 1 |
||
| + | |[[Kirby]] |
||
| + | |[[File:KPR Sticker 83.png]] |
||
| + | |In room with the third [[Code Cube]]; in the far left area in the background in a crate. |
||
| + | |- |
||
| + | |Stage 2 |
||
| ⚫ | |||
| + | |[[File:KPR Sticker 122.png]] |
||
| + | |After the third Code Cube; use 3D Spring Hopper when red storage containers appear in background (before the three [[Glunk]]s). |
||
| + | |- |
||
| + | |Stage 3 |
||
| ⚫ | |||
| + | |[[File:KPR Sticker 189.png]] |
||
| + | |In room with the first [[Robobot Armor]], place a heavy block on crank platform, move platform to the background, and use [[3D Warp Star]] to go into the background; jump onto heavy block to reach higher area; break [[Durable Block]]s. |
||
| + | |- |
||
| + | |Stage 4 |
||
| ⚫ | |||
| + | |[[File:KPR Sticker 123.png]] |
||
| + | |In an optional room with the second Code Cube, destroy [[Fire Block]]s in the bottom left of the hollow square. |
||
| + | |- |
||
| + | |Stage 5 |
||
| ⚫ | |||
| + | |[[File:KPR Sticker 162.png]] |
||
| + | |After defeating [[Bonkers]], use [[Hammer]] to pound the stakes beforehand. Enter the door and open a [[Treasure Chest]] in next room. |
||
| + | |- |
||
| + | |Stage 7 |
||
| + | |[[Claycia]] |
||
| + | |[[File:KPR Sticker 198.png]] |
||
| + | |After the first Code Cube, under the boat supporting the door. |
||
| + | |} |
||
| + | |||
| + | ==Etymology== |
||
| + | Overload Ocean's name comes from a software engineering process in computers. |
||
| + | |||
| + | Its Japanese name, Octarn Ocean, is a reference to the octal numeral system, which is base-8 instead of base-10. |
||
| + | |||
| + | ==Music== |
||
| + | "Bountiful Star" plays in Stage 1, the first two rooms of Stage 2, and the first room in Stage 3. "Pink Ball Activate!" plays in Stage 2 after obtaining [[Wheel]] Mode. "Industrial [[Laboratory]]" plays in Stage 3 after entering the lab; this is a remix of "[[Float Islands]]" from ''[[Kirby's Dream Land]]''. "Time for Dessert!" plays in Stage 4. "Rhythm Code" plays in the puzzle rooms in Stages 4 and 5. "Submarine Suburbs" plays in Stage 5. "Haltmann Works Co. Theme Song" plays in Stage 6 during the "[[Susie]], Executive Assistant" cutscene. “Let’s Go Home” plays in Stage 6 after defeating Susie. Stage 7 features music from past games: "[[Machine Mansion]]" from ''[[Kirby: Canvas Curse]]'', which is a remix of the floating boat theme from ''[[Kirby: Nightmare in Dream Land]]'', plays in the first room; "Float Islands" from ''[[Kirby Air Ride]]'', which is also a remix of Float Islands, plays in the second and sixth rooms; "Learn the Rules" from ''[[Kirby's Dream Course]]'' plays in the puzzle room; "[[White Wafers|Aurora Area]]" from ''[[Kirby's Return to Dream Land]]'' plays in the third and fourth rooms; "[[Top Ride]]: [[Water (Top Ride course)|Water]]" from ''Kirby Air Ride'' plays in the fifth room. |
||
==Trivia== |
==Trivia== |
||
| + | *In Stage 1, the first enemy seen is a [[Knuckle Joe]], and just after it is a small body of water. In ''[[Kirby Super Star]]'' and [[Kirby Super Star Ultra|its remake]], the first enemy in Float Islands is also a Knuckle Joe, and just after it is a small body of water. |
||
| − | *The music played in the research facility in Stage 3 is a remix of [[Float Islands]]' music from ''[[Kirby's Dream Land]]''. It also plays [[Neo Greo]]'s theme from ''[[Kirby: Canvas Curse]]''. |
||
| − | *The themes played in the EX Stage are a remix of the music in the [[mine cart]] sections of [[The Great Cave Offensive]] from ''[[Kirby Super Star]]'', [[Float Islands]]' music from ''[[Kirby's Dream Land]]'', and Stage 5 of [[White Wafer]]'s music from ''[[Kirby's Return to Dream Land]]''. |
||
==Gallery== |
==Gallery== |
||
| Line 66: | Line 147: | ||
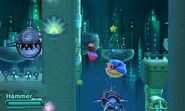
KPR Overload Ocean 1.jpg|Kirby swims through dangerous waters. |
KPR Overload Ocean 1.jpg|Kirby swims through dangerous waters. |
||
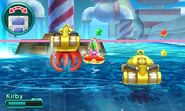
KPR Overload Ocean 2.jpg|Kirby's Wheel Robobot Armor powers a machine that carves a [[Door|goal door]] out of stone. |
KPR Overload Ocean 2.jpg|Kirby's Wheel Robobot Armor powers a machine that carves a [[Door|goal door]] out of stone. |
||
| − | KPR Haltmann Tower O2.jpg|[[Ninja]] Kirby attacks [[ |
+ | KPR Haltmann Tower O2.jpg|[[Ninja]] Kirby attacks [[Labotory|Labotories]]. |
KPR Overload Ocean 4.jpg|Kirby stands in a frozen treat facility. |
KPR Overload Ocean 4.jpg|Kirby stands in a frozen treat facility. |
||
| − | KPR Overload Ocean 5.jpg|Kirby avoids [[Mamanti]] and [[ |
+ | KPR Overload Ocean 5.jpg|Kirby avoids [[Mamanti]] and [[Mech Acro]]s deep underwater. |
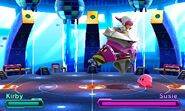
| − | Susie Battle 1.jpg|Kirby battles Susie. |
+ | Susie Battle 1.jpg|Kirby battles [[Susie]]. |
KPR Overload Ocean 7.jpg|Kirby rides a [[Tilt Gondola]] while carrying a [[battery]]. |
KPR Overload Ocean 7.jpg|Kirby rides a [[Tilt Gondola]] while carrying a [[battery]]. |
||
</gallery> |
</gallery> |
||
| Line 78: | Line 159: | ||
[[Category:Levels]] |
[[Category:Levels]] |
||
[[Category:Levels in Kirby: Planet Robobot]] |
[[Category:Levels in Kirby: Planet Robobot]] |
||
| + | [[Category:Water]] |
||
Revision as of 17:24, 3 November 2019
Overload Ocean is a mechanized ocean on Planet Popstar and serves as the third level of Kirby: Planet Robobot.
General Information
Overload Ocean is an ocean that has been largely taken over by a marine port built by the Haltmann Works Company. Shipping containers, submarines, cranes, and other apparatus are found here. In addition to this, the company has established a research facility, a giant building made out of frozen treats, and underwater cities. With Robobot Armor's Wheel and Ice Modes, Kirby can race through enemies and build snowmen.
By collecting at least six of the 15 Code Cubes scattered throughout Overload Ocean, Kirby disables the firewall protecting the boss. He then meets and fights Susie.
Copy Abilities
Beam |
Bomb |
Cutter |
Doctor |
ESP |
Fighter |
Fire |
Hammer |
Ice |
Jet |
Leaf |
Mike |
Mirror |
Ninja |
Parasol |
Poison |
Sleep |
Smash Bros. |
Spark |
Stone |
Sword |
Wheel |
Robobot Abilities
 Beam Mode |
 Bomb Mode |
 ESP Mode |
 Fire Mode |
 Ice Mode |
 Parasol Mode |
 Spark Mode |
 Sword Mode |
 Wheel Mode |
Code Cubes
Stage 1
- Destroy the Bomb Block in the sloping room after Blocky.
- Place Cannon on left fuse. Use Fire Mode to light fuse.
- Break Durable Blocks with Robobot Armor near Docking Station. Go underwater and take the pipe to the left to the background.
Stage 2
- 3D Spring Hopper during first Wheel Mode segment; parallels Glunk; in plain sight.
- In optional room after second Wheel Mode segment.
- Jump near end of third Wheel Mode segment.
Stage 3
- Follow the correct path as displayed by the screen in the background: ride 3D Warp Star, skip 3D Warp Star, ride 3D Warp Star.
- Use crank to move platform to destroy Star Blocks underneath Treasure Chest.
- Press all switches in autoscrolling room.
Stage 4
- Near the end of the room with Invincible Candy. Underneath the door.
- In the next room, use Ice/Parasol to douse and destroy Fire Blocks. Enter the optional room. Douse Fire Blocks to access Battery to activate Swap Chamber.
- Place head on third snowman.
Stage 5
- In optional room in second room, catch the Battery and use on the Swap Chamber.
- In room with Rare Sticker/after Bonkers, destroy blocks on the right of the room and pound the stake. Travel into the foreground and locate the Code Cube.
- In the next room, catch the Battery near the end of the room and use it on Swap Chamber.
Stage 7
- Carry the Battery to the Swap Chamber to access the optional room. Use ESP to power lower wire to open upper gate.
- Use Ice Mode to freeze water spouts. Carry wire block to the rest of the wire. Use Spark Mode to power wire to open the gate.
- In Treasure Chest after defeating King Doo 2.0.
Rare stickers
| Stage | Rare Sticker | Image | Guide |
|---|---|---|---|
| Stage 1 | Kirby | 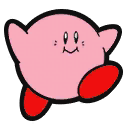
|
In room with the third Code Cube; in the far left area in the background in a crate. |
| Stage 2 | Gryll | 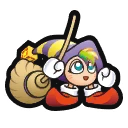
|
After the third Code Cube; use 3D Spring Hopper when red storage containers appear in background (before the three Glunks). |
| Stage 3 | People of the Sky | 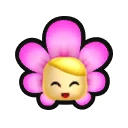
|
In room with the first Robobot Armor, place a heavy block on crank platform, move platform to the background, and use 3D Warp Star to go into the background; jump onto heavy block to reach higher area; break Durable Blocks. |
| Stage 4 | Ribbon | 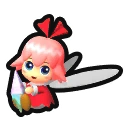
|
In an optional room with the second Code Cube, destroy Fire Blocks in the bottom left of the hollow square. |
| Stage 5 | Daroach | 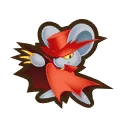
|
After defeating Bonkers, use Hammer to pound the stakes beforehand. Enter the door and open a Treasure Chest in next room. |
| Stage 7 | Claycia | 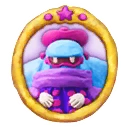
|
After the first Code Cube, under the boat supporting the door. |
Etymology
Overload Ocean's name comes from a software engineering process in computers.
Its Japanese name, Octarn Ocean, is a reference to the octal numeral system, which is base-8 instead of base-10.
Music
"Bountiful Star" plays in Stage 1, the first two rooms of Stage 2, and the first room in Stage 3. "Pink Ball Activate!" plays in Stage 2 after obtaining Wheel Mode. "Industrial Laboratory" plays in Stage 3 after entering the lab; this is a remix of "Float Islands" from Kirby's Dream Land. "Time for Dessert!" plays in Stage 4. "Rhythm Code" plays in the puzzle rooms in Stages 4 and 5. "Submarine Suburbs" plays in Stage 5. "Haltmann Works Co. Theme Song" plays in Stage 6 during the "Susie, Executive Assistant" cutscene. “Let’s Go Home” plays in Stage 6 after defeating Susie. Stage 7 features music from past games: "Machine Mansion" from Kirby: Canvas Curse, which is a remix of the floating boat theme from Kirby: Nightmare in Dream Land, plays in the first room; "Float Islands" from Kirby Air Ride, which is also a remix of Float Islands, plays in the second and sixth rooms; "Learn the Rules" from Kirby's Dream Course plays in the puzzle room; "Aurora Area" from Kirby's Return to Dream Land plays in the third and fourth rooms; "Top Ride: Water" from Kirby Air Ride plays in the fifth room.
Trivia
- In Stage 1, the first enemy seen is a Knuckle Joe, and just after it is a small body of water. In Kirby Super Star and its remake, the first enemy in Float Islands is also a Knuckle Joe, and just after it is a small body of water.
