m (→Trivia) |
Zhanghm11111 (talk | contribs) m (→In Other Languages: ch-trad-name→ch-simp-name) |
||
| (42 intermediate revisions by 15 users not shown) | |||
| Line 1: | Line 1: | ||
| − | {{clean up}} |
||
{{Level-infobox |
{{Level-infobox |
||
| − | |image = [[File:KRtDL Dangerous Dinner plaque.png |
+ | |image = [[File:KRtDL Dangerous Dinner plaque.png]] |
|caption = ''[[Kirby's Return to Dream Land]]'' icon |
|caption = ''[[Kirby's Return to Dream Land]]'' icon |
||
| − | |jap_name = デンジャラス ディナー (Denjarasu |
+ | |jap_name = デンジャラス ディナー (Denjarasu Dinā) |
| − | |jap_meaning = |
+ | |jap_meaning = Dangerous Dinner <br>デンジャラス = Dangerous, ディナー = Dinner |
|appearance = {{LevelSequence|KRtDL|7|type=Level}} |
|appearance = {{LevelSequence|KRtDL|7|type=Level}} |
||
|theme = Volcanic world |
|theme = Volcanic world |
||
|world = [[Halcandra]] |
|world = [[Halcandra]] |
||
| + | |icon = [[File:KRtDL_Dangerous_Dinner_icon.png|60px]] |
||
|boss = [[Landia]] |
|boss = [[Landia]] |
||
| + | |common enemies = [[Barracu]], [[Blade Knight]], [[Blipper]], [[Chilly]], [[Coldtzo]], [[Degout]], [[Dubior Jr.]], [[Elec]], [[Flamer]], [[Foley]], [[Galbo]], [[Gemra]], [[Gigatzo]], [[Glunk]], [[Gordo]], [[Bouncy#Kirby's Return to Dream Land and Kirby's Dream Collection Special Edition|Halcan Bouncy]], [[Bowby|Halcan Bowby]], [[Armor Dee|Halcandle Armor Dee]], [[Waddle Dee#Halcandle Dee|Halcandle Dee]], [[Bronto Burt#Kirby's Return to Dream Land and Kirby's Dream Collection Special Edition|Halcant Burt]], [[Hot Head]], [[Iron Barbar]], [[Juckle]], [[Kabu]], [[Key Dee]], [[Knuckle Joe]], [[Lanzer]], [[Leafan]], [[Moonja]], [[Noddy]], [[Owgulf]], [[Parasol (enemy)|Parasol]], [[Parasol Waddle Dee]], [[Pierce]], [[Rocky]], [[Scarfy]], [[Searches]], [[Shotzo]], [[Sir Kibble]], [[Snowl]], [[Squishy]], [[Starman]], [[Super Blade Knight]], [[Super Chilly]], [[Tick]], [[Togekuki]], [[Twister]], [[Volttzo]], [[Waddle Doo]], [[Walf]], [[Walky]], [[Water Galbo]], [[Whippy (enemy)|Whippy]] |
||
| − | |common enemies = |
||
| + | |mini-boss = [[Sphere Doomer]], [[Water Galboros]], [[Super Bonkers]], [[Dubior]], [[Gigant Edge]], [[Moundo]], [[Kibble Blade]], [[King Doo]], [[Bonkers]] |
||
}} |
}} |
||
| + | '''Dangerous Dinner''' is the seventh level of ''[[Kirby's Return to Dream Land]]''. |
||
| ⚫ | |||
| − | '''Dangerous Dinner''' is the 7th level in ''[[Kirby's Return to Dream Land]]''. It is the second and final area on [[Halcandra]] that [[Kirby]] and company journey through after the [[Lor Starcutter]]'s crash landing. |
||
| + | Dangerous Dinner is the second and final level of the game to take place on [[Halcandra]]. A place of high volcanic activity and large mountains, [[Kirby]] and company journey through it after the crash landing of the [[Lor Starcutter]]. On their adventure, they travel across the fiery land in search of [[Landia]], who stands at the top of one of the volcanoes. |
||
| ⚫ | Dangerous Dinner introduces [[Environment#Lava|lava]] into the game. As previously mentioned, it can create towering pillars of lava, as well as spheres of molten rock that float around the screen. [[Iron Barbar]]s dwell in some lava pits. Kirby can use [[Super Ability|Super Abilities]] to clear the way in some stages, revealing [[dimensional rift]]s. |
||
| − | Dangerous Dinner is a place of highly active volcanic activity. Large mountains of fire usually spew from the lava. Landia is at the top of one of the volcanoes, the boss stage. |
||
| + | Dangerous Dinner contains four levels. The [[mid-boss]]es of the first stage are [[Water Galboros]] and [[Sphere Doomer#Ice Sphere Doomer|Ice Sphere Doomer]], the mid-bosses of the second stage are [[Super Bonkers]] and Ice Sphere Doomer, and the mid-bosses of the third stage are [[Dubior]], [[Gigant Edge]], [[Moundo]], [[Kibble Blade]], [[King Doo]], [[Bonkers]], and [[Sphere Doomer#Sphere Doomer|purple]] and [[Sphere Doomer#Fire Sphere Doomer|Fire Sphere Doomer]]. The [[boss]] of Dangerous Dinner is Landia. |
||
| ⚫ | |||
| ⚫ | |||
| + | ==[[Copy Ability|Copy Abilities]]== |
||
| − | ==Enemies== |
||
| + | Aside from two Super Abilities, all Copy Abilities are present. |
||
| − | *[[Lanzer]] |
||
| + | {| class="wikitable" cellpadding="0" cellspacing="0" style="width: 660px; text-align: center;" |
||
| − | *[[Waddle Doo]] |
||
| + | |[[File:KRtDL Beam icon.png|x55px|link=Beam]][[File:KRtDL Beam UI.png|x55px|link=Beam]]<br />[[Beam]] |
||
| − | *[[Bronto Burt]] |
||
| + | |[[File:KRtDL Bomb icon.png|x55px|link=Bomb]][[File:KRtDL Bomb UI.png|x55px|link=Bomb]]<br />[[Bomb]] |
||
| − | *[[Hot Head]] |
||
| + | |[[File:KRtDL Crash icon.png|x55px|link=Crash]][[File:KRtDL Crash UI.png|x55px|link=Crash]]<br />[[Crash]] |
||
| − | *[[Scarfy]] |
||
| + | |[[File:KRtDL Cutter icon.png|x55px|link=Cutter]][[File:KRtDL Cutter UI.png|x55px|link=Cutter]]<br />[[Cutter]] |
||
| − | *[[Leafan]] |
||
| + | |- |
||
| − | *[[Togekuki]] |
||
| + | |[[File:KRtDL Fighter icon.png|x55px|link=Fighter]][[File:KRtDL Fighter UI.png|x55px|link=Fighter]]<br />[[Fighter]] |
||
| − | *[[Tick]] |
||
| + | |[[File:KRtDL Fire icon.png|x55px|link=Fire]][[File:KRtDL Fire UI.png|x55px|link=Fire]]<br />[[Fire]] |
||
| − | *[[Foley]] |
||
| + | |[[File:KRtDL Hammer icon.png|x55px|link=Hammer]][[File:KRtDL Hammer UI.png|x55px|link=Hammer]]<br />[[Hammer]] |
||
| − | *[[Waddle Dee]] |
||
| + | |[[File:KRtDL Hi-Jump icon.png|x55px|link=Hi-Jump]][[File:KRtDL Hi-Jump UI.png|x55px|link=Hi-Jump]]<br />[[Hi-Jump]] |
||
| − | *[[Flamer]] |
||
| + | |- |
||
| − | *[[Shotzo]] |
||
| + | |[[File:KRtDL Ice icon.png|x55px|link=Ice]][[File:KRtDL Ice UI.png|x55px|link=Ice]]<br />[[Ice]] |
||
| − | *[[Whippy (Kirby's Return to Dream Land)|Whippy]] |
||
| + | |[[File:KRtDL Leaf icon.png|x55px|link=Leaf]][[File:KRtDL Leaf UI.png|x55px|link=Leaf]]<br />[[Leaf]] |
||
| − | *[[Iron Barbar]] |
||
| + | |[[File:KRtDL Mike icon.png|x55px|link=Mike]][[File:KRtDL Mike UI.png|x55px|link=Mike]]<br />[[Mike]] |
||
| − | *[[Twister]] |
||
| + | |[[File:KRtDL Needle icon.png|x55px|link=Needle]][[File:KRtDL Needle UI.png|x55px|link=Needle]]<br />[[Needle]] |
||
| − | *[[Carry Dee]] |
||
| + | |- |
||
| − | *[[Super Chilly]] |
||
| + | |[[File:KRtDL Ninja icon.png|x55px|link=Ninja]][[File:KRtDL Ninja UI.png|x55px|link=Ninja]]<br />[[Ninja]] |
||
| − | *[[Bouncy]] |
||
| + | |[[File:KRtDL Parasol icon.png|x55px|link=Parasol]][[File:KRtDL Parasol UI.png|x55px|link=Parasol]]<br />[[Parasol]] |
||
| − | *[[Sir Kibble]] |
||
| + | |[[File:KRtDL Sleep icon.png|x55px|link=Sleep]][[File:KRtDL Sleep UI.png|x55px|link=Sleep]]<br />[[Sleep]] |
||
| − | *[[Armored Waddle Dee]] |
||
| + | |[[File:KRtDL Spark icon.png|x55px|link=Spark]][[File:KRtDL Spark UI.png|x55px|link=Spark]]<br />[[Spark]] |
||
| − | *[[Gigatzo]] |
||
| + | |- |
||
| − | *[[Volttzo]] |
||
| + | |[[File:KRtDL Spear icon.png|x55px|link=Spear]][[File:KRtDL Spear UI.png|x55px|link=Spear]]<br />[[Spear]] |
||
| − | *[[Coldtzo]] |
||
| + | |[[File:KRtDL Stone icon.png|x55px|link=Stone]][[File:KRtDL Stone UI.png|x55px|link=Stone]]<br />[[Stone]] |
||
| − | *[[Snowl]] |
||
| + | |[[File:KRtDL Sword icon.png|x55px|link=Sword]][[File:KRtDL Sword UI.png|x55px|link=Sword]]<br />[[Sword]] |
||
| − | *[[Pierce]] |
||
| + | |[[File:KRtDL Tornado icon.png|x55px|link=Tornado]][[File:KRtDL Tornado UI.png|x55px|link=Tornado]]<br />[[Tornado]] |
||
| − | *[[Bowby]] |
||
| + | |} |
||
| − | *[[Juckle]] |
||
| + | {| class="wikitable" cellpadding="0" cellspacing="0" style="width: 660px; text-align: center;" |
||
| − | *[[Search]] |
||
| + | |[[File:KRtDL Water icon.png|x55px|link=Water]][[File:KRtDL Water UI.png|x55px|link=Water]]<br />[[Water]] |
||
| − | *[[Degout]] |
||
| + | |[[File:KRtDL Whip icon.png|x55px|link=Whip]][[File:KRtDL Whip UI.png|x55px|link=Whip]]<br />[[Whip]] |
||
| − | *[[Tsukikage]] |
||
| + | |[[File:KRtDL Wing icon.png|x55px|link=Wing]][[File:KRtDL Wing UI.png|x55px|link=Wing]]<br />[[Wing]] |
||
| − | *[[Starman]] |
||
| + | |} |
||
| − | *[[Gemra]] |
||
| − | *[[Elec]] |
||
| − | *[[Glunk]] |
||
| − | *[[Blipper]] |
||
| − | *[[Squishy]] |
||
| − | *[[Barracu]] |
||
| − | *[[Walf]] |
||
| − | *[[Galbo]] |
||
| − | *[[Water Galbo]] |
||
| − | *[[Noddy]] |
||
| − | *[[Blade Knight]] |
||
| − | *[[Walky]] |
||
| − | *[[Knuckle Joe]] |
||
| − | *[[Rocky]] |
||
| − | *[[Chilly]] |
||
| − | *[[Parasol Waddle Dee]] |
||
| − | *[[Owgulf]] |
||
| − | *[[Gordo]] |
||
| − | *[[Kabu]] |
||
| − | *[[Degout]] |
||
| − | *[[Super Blade Knight]] |
||
| ⚫ | |||
| − | ==Mid-Bosses== |
||
| + | {| class="wikitable" cellpadding="0" cellspacing="0" style="width: 660px; text-align: center;" |
||
| − | *[[Sphere Doomer]] |
||
| + | |[[File:KRtDL Snow Bowl icon.png|x55px|link=Snow Bowl]][[File:KRtDL Snow Bowl UI.png|x55px|link=Snow Bowl]]<br />[[Snow Bowl]] |
||
| − | *[[Water Galboros]] |
||
| + | |[[File:KRtDL Grand Hammer icon.png|x55px|link=Grand Hammer]][[File:KRtDL Grand Hammer UI.png|x55px|link=Grand Hammer]]<br />[[Grand Hammer]] |
||
| − | *[[Super Bonkers]] |
||
| + | |[[File:KRtDL Ultra Sword icon.png|x55px|link=Ultra Sword]][[File:KRtDL Ultra Sword UI.png|x55px|link=Ultra Sword]]<br />[[Ultra Sword]] |
||
| − | *[[Dubior]] |
||
| + | |} |
||
| − | *[[Gigant Edge]] |
||
| − | *[[Moundo]] |
||
| − | *[[Kibble Blade]] |
||
| − | *[[King Doo]] |
||
| − | *[[Bonkers]] |
||
| ⚫ | |||
| − | *[[Spear]] |
||
| − | *[[Beam]] |
||
| ⚫ | |||
| − | *[[Leaf]] |
||
| − | *[[Needle]] |
||
| − | *[[Bomb]] |
||
| − | *[[Water]] |
||
| − | *[[Whip]] |
||
| − | *[[Tornado]] |
||
| − | *[[Cutter]] |
||
| − | *[[Sleep]] |
||
| − | *[[Ice]] |
||
| − | *[[Crash]] |
||
| − | *[[Ninja]] |
||
| − | *[[Hi-Jump]] |
||
| − | *[[Spark]] |
||
| − | *[[Sword]] |
||
| − | *[[Mike]] |
||
| − | *[[Hammer]] |
||
| − | *[[Fighter]] |
||
| − | *[[Stone]] |
||
| − | *[[Parasol]] |
||
| − | *[[Wing]] |
||
| − | == |
+ | ==[[Energy Sphere]]s== |
| + | ===Stage 1=== |
||
| − | *[[Snow Bowl]] |
||
| + | #In the room with the boulders, grab the [[Key]] and keep on running, avoiding the Halcandran [[Waddle Dee]] in the way. Bring the Key to the lock. |
||
| − | *[[Grand Hammer]] |
||
| + | #Obtain [[Water]] from [[Water Galboros]], grab the Key and Surf across the magma. After bringing the Key to the lock, enter the optional room. Use Water to douse the exposed [[Fire Block]]s, but don't destroy them. Grab the Key and ascend the cooled stairway. |
||
| − | *[[Ultra Sword]] |
||
| + | #Destroy the [[Bomb Block]] above the [[Iron Barbar]] pit. Enter the optional door. Press only the [[Switch]]es that will help the [[Key Dee]] reach the end. Don't press the third or sixth Switches, and wait until the moving platform is on the left side before pressing the seventh Switch. |
||
| + | #Use [[Snow Bowl]] to freeze the volcano. Once the volcano shatters, a [[Dimensional rift]] zone will appear. Enter the Dimensional rift and defeat the [[Sphere Doomer#Ice Sphere Doomer|Ice Sphere Doomer]] at the end. |
||
| + | |||
| + | ===Stage 2=== |
||
| + | #In the first room, defeat the [[Degout]]s on the left. |
||
| + | #In the second room, obtain [[Ninja]] from [[Moonja]]. In the section with the ladder to the left and the lava wall to the right, there's a passage to the right that leads to an optional door. Use Wall Cling on the top left overhang. Use Wall Strike when the lava pillar lowers slightly. |
||
| + | #Obtain [[Hi-Jump]] from the [[Starman]] or the [[Copy Essence]]. In the section with the Halcandran [[Bouncy]]s, take the rightward route, using a Hi-Jump to pass through when the passage opens up briefly. Do this a second time. |
||
| + | #Use [[Grand Hammer]] to complete the electric circuits that activate a detonation, as well as pound the pipes that spew out fire. The third circuit is the only circuit required to progress. The fifth and third bar need a Grand Hammer, and the second bar needs a Super Hammer Plus. After the third circuit has been bypassed, destroy the [[Durable Block]]s and pound in the small pipes, causing the crystal to be destroyed, allowing the player to pound the large pipe using Super Hamer Plus. This will cause the statue to drop into the lava, revealing the Dimensional rift zone. Enter the Dimensional rift and defeat the Ice Sphere Doomer at the end. |
||
| + | |||
| + | ===Stage 3=== |
||
| + | #Destroy the stone blocks in the ground and run across the [[Collapse Block]]s. |
||
| + | #In the room with the Halcandran [[Parasol Waddle Dee]]s, instead of running below the second giant molten rock, float above it when it descends, revealing an optional door. Enter the optional door. Use the first [[Stomper Boot]] to destroy the Durable Blocks and bounce on the lava and [[Gordo]]s, eventually gaining access to the second Stomper Boot. Use the second Stomper Boot to bounce on the molten rocks and Gordo, and destroy the Durable Blocks at the end. |
||
| + | #Use the [[Prism Shield]] to defeat the Key Dee at the end of the elevator room. Grab the Key and enter the door. Quickly traverse the room, as the Key has a time limit, while also avoiding obstacles such as [[Hunter Scarfy|Hunter Scarfies]], red [[Degout]]s, molten rocks, Iron Barbars, and other enemies. |
||
| + | #Use [[Ultra Sword]] to cut the volcano in half. Inside the volcano is the Dimensional rift zone. Enter the Dimensional rift and defeat the purple and [[Sphere Doomer#Fire Sphere Doomer|Fire Sphere Doomer]]s at the end. |
||
| + | |||
| + | ==In Other Languages== |
||
| + | {{Nomenclature |
||
| + | |jap-name={{Hover|Denjarasu Dinā|デンジャラス ディナー}} |
||
| + | |jap-mean=Officially romanized as '''Dangerous Dinner'''. |
||
| + | |eng-name=Dangerous Dinner |
||
| + | |eng-mean= |
||
| + | |ch-trad-name= |
||
| + | |ch-trad-mean= |
||
| + | |ch-simp-name={{Hover|Wéixiǎn wǎncān|危险晚餐}} |
||
| + | |ch-simp-mean=Translates to '''Dangerous Dinner'''. |
||
| + | |kor-name= |
||
| + | |kor-mean= |
||
| + | |hin-name= |
||
| + | |hin-mean= |
||
| + | |ara-name= |
||
| + | |ara-mean= |
||
| + | |rus-name= |
||
| + | |rus-mean= |
||
| + | |pal-name= |
||
| + | |pal-mean= |
||
| + | |ger-name=Nacho-Nervenkitzel |
||
| + | |ger-mean=Translates to '''Nacho Thrill'''. |
||
| + | |pol-name= |
||
| + | |pol-mean= |
||
| + | |dut-name= |
||
| + | |dut-mean= |
||
| + | |fren-name=Terrain tonitruant |
||
| + | |fren-mean=Translates to '''Thunderous Terrain'''. |
||
| + | |fren-fr-name= |
||
| + | |fren-fr-mean= |
||
| + | |fren-ca-name= |
||
| + | |fren-ca-mean= |
||
| + | |ital-name=Cena Cimentosa |
||
| + | |ital-mean=Translates to '''Dangerous Dinner'''. |
||
| + | |span-name= |
||
| + | |span-mean= |
||
| + | |span-sp-name=Volcán Vainilla |
||
| + | |span-sp-mean=Translates to '''Vanilla Volcano'''. |
||
| + | |span-la-name=Rocas de Rábano |
||
| + | |span-la-mean=Translates to '''Radish Rocks'''. |
||
| + | |por-name= |
||
| + | |por-mean= |
||
| + | |por-pt-name= |
||
| + | |por-pt-mean= |
||
| + | |por-br-name= |
||
| + | |por-br-mean= |
||
| + | }} |
||
| − | ==Boss== |
||
| − | *[[Landia]] |
||
==Trivia== |
==Trivia== |
||
| − | *Stage 3 of Dangerous Dinner contains a secret; in the last room, Kirby must float up to the molten planetoid toward the top of the screen and press up. He will enter it like he would a door. The room is windy and will push Kirby downwards. He can collect food, stars, red stars |
+ | *Stage 3 of Dangerous Dinner contains a [[Secret area#Kirby's Return to Dream Land|secret area]]; in the last room, Kirby must float up to the molten planetoid toward the top of the screen and press up. He will enter it like he would enter a [[door]]. The room is windy and will push Kirby downwards. He can collect food, stars, red stars and a blue star as he falls. |
| − | **This room is a reference to the secret room accessed by entering the moon in ''[[Kirby's Dream Land]]'', ''[[Kirby Super Star]]'' |
+ | **This room is a reference to the secret room accessed by entering the moon in ''[[Kirby's Dream Land]]'', ''[[Kirby Super Star]]'' and ''[[Kirby Super Star Ultra]]''. |
| + | [[File:Dangerous Dinner Z Top.jpg|thumb|Haldera Volcano]] |
||
| + | *A stage based on Stage 1 of Dangerous Dinner appears in ''[[Kirby Fighters Deluxe]]''. It is named [[Haldera Volcano]] after the music track of the same name, which is likely a portmanteau of [[wikipedia:Caldera|caldera]] (a volcanic feature) with [[HAL Laboratory|HAL]], a name created in a similar fashion to those of the [[Halberd]] and [[Halcandra]]. |
||
| + | *The music played in the first two stages is reused for Stage 7 of [[Endless Explosions]] in ''[[Kirby: Triple Deluxe]]''. |
||
| + | *The map music is featured as a track in ''[[Super Smash Bros. Ultimate]]''. |
||
| + | <gallery type="slideshow"> |
||
| + | KSA Dangerous Dinner 1.jpg|Stage 3 |
||
| + | KSA Dangerous Dinner 2.jpg|Stage 3 |
||
| + | KSA Dangerous Dinner 3.jpg|Stage 3 |
||
| + | KSA Dangerous Dinner 4.jpg|Stage 3 |
||
| + | KSA Dangerous Dinner 5.jpg|Stage 3 |
||
| + | KSA Dangerous Dinner 6.jpg|Stage 3 |
||
| + | KSA Dangerous Dinner 7.jpg|Stage 3 |
||
| + | KSA Dangerous Dinner Rift 2.jpg|Stage 3 |
||
| + | KSA Dangerous Dinner Rift 3.jpg|Stage 3 |
||
| + | </gallery> |
||
| + | *In ''[[Kirby Star Allies]]'', when playing the [[Guest Star ???? Star Allies Go!]] [[sub-game]] as [[Magolor]], some stage layout in Level 5 is changed to reflect Stage 3 of Dangerous Dinner from ''Kirby's Return to Dream Land''. The "dimensional rift sequence" replicates some layout from Stage 5 of [[Egg Engines]] (despite that portion being on Halcandra, not inside a rift), and Sphere Doomers are represented by a [[Bronto Burt]] [[Room Guarder]] and [[Vividria|Twin Vividria]]. |
||
| + | *Infinite Power, the theme of Stage 3, is part of the medley that plays in [[Heroes in Another Dimension]]. |
||
==Gallery== |
==Gallery== |
||
<gallery> |
<gallery> |
||
| − | 20130819232600!Dangerous_Dinner.png |
+ | 20130819232600!Dangerous_Dinner.png|''[[Kirby's Return to Dream Land]]'' |
</gallery> |
</gallery> |
||
{{Levels}} |
{{Levels}} |
||
| + | |||
| + | [[de:Nacho-Nervenkitzel]] |
||
| + | [[es:Volcán Vainilla]] |
||
| + | [[fr:Terrain tonitruant]] |
||
| + | [[it:Cena Cimentosa]] |
||
| + | [[ja:デンジャラス ディナー]] |
||
| + | [[zh:危险晚餐]] |
||
[[Category:Levels]] |
[[Category:Levels]] |
||
[[Category:Levels in Kirby's Return to Dream Land]] |
[[Category:Levels in Kirby's Return to Dream Land]] |
||
| ⚫ | |||
Revision as of 09:37, 9 May 2020
Dangerous Dinner is the seventh level of Kirby's Return to Dream Land.
General Information
Dangerous Dinner is the second and final level of the game to take place on Halcandra. A place of high volcanic activity and large mountains, Kirby and company journey through it after the crash landing of the Lor Starcutter. On their adventure, they travel across the fiery land in search of Landia, who stands at the top of one of the volcanoes.
Dangerous Dinner introduces lava into the game. As previously mentioned, it can create towering pillars of lava, as well as spheres of molten rock that float around the screen. Iron Barbars dwell in some lava pits. Kirby can use Super Abilities to clear the way in some stages, revealing dimensional rifts.
Dangerous Dinner contains four levels. The mid-bosses of the first stage are Water Galboros and Ice Sphere Doomer, the mid-bosses of the second stage are Super Bonkers and Ice Sphere Doomer, and the mid-bosses of the third stage are Dubior, Gigant Edge, Moundo, Kibble Blade, King Doo, Bonkers, and purple and Fire Sphere Doomer. The boss of Dangerous Dinner is Landia.
Copy Abilities
Aside from two Super Abilities, all Copy Abilities are present.
 Beam |
 Bomb |
 Crash |
 Cutter |
 Fighter |
 Fire |
 Hammer |
 Hi-Jump |
 Ice |
 Leaf |
 Mike |
 Needle |
 Ninja |
 Parasol |
 Sleep |
 Spark |
 Spear |
 Stone |
 Sword |
 Tornado |
 Water |
 Whip |
 Wing |
Super Abilities
 Snow Bowl |
 Grand Hammer |
 Ultra Sword |
Energy Spheres
Stage 1
- In the room with the boulders, grab the Key and keep on running, avoiding the Halcandran Waddle Dee in the way. Bring the Key to the lock.
- Obtain Water from Water Galboros, grab the Key and Surf across the magma. After bringing the Key to the lock, enter the optional room. Use Water to douse the exposed Fire Blocks, but don't destroy them. Grab the Key and ascend the cooled stairway.
- Destroy the Bomb Block above the Iron Barbar pit. Enter the optional door. Press only the Switches that will help the Key Dee reach the end. Don't press the third or sixth Switches, and wait until the moving platform is on the left side before pressing the seventh Switch.
- Use Snow Bowl to freeze the volcano. Once the volcano shatters, a Dimensional rift zone will appear. Enter the Dimensional rift and defeat the Ice Sphere Doomer at the end.
Stage 2
- In the first room, defeat the Degouts on the left.
- In the second room, obtain Ninja from Moonja. In the section with the ladder to the left and the lava wall to the right, there's a passage to the right that leads to an optional door. Use Wall Cling on the top left overhang. Use Wall Strike when the lava pillar lowers slightly.
- Obtain Hi-Jump from the Starman or the Copy Essence. In the section with the Halcandran Bouncys, take the rightward route, using a Hi-Jump to pass through when the passage opens up briefly. Do this a second time.
- Use Grand Hammer to complete the electric circuits that activate a detonation, as well as pound the pipes that spew out fire. The third circuit is the only circuit required to progress. The fifth and third bar need a Grand Hammer, and the second bar needs a Super Hammer Plus. After the third circuit has been bypassed, destroy the Durable Blocks and pound in the small pipes, causing the crystal to be destroyed, allowing the player to pound the large pipe using Super Hamer Plus. This will cause the statue to drop into the lava, revealing the Dimensional rift zone. Enter the Dimensional rift and defeat the Ice Sphere Doomer at the end.
Stage 3
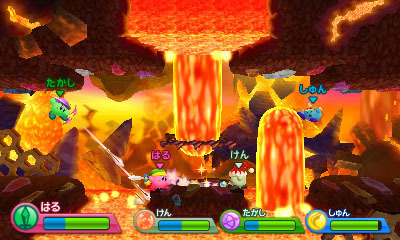
- Destroy the stone blocks in the ground and run across the Collapse Blocks.
- In the room with the Halcandran Parasol Waddle Dees, instead of running below the second giant molten rock, float above it when it descends, revealing an optional door. Enter the optional door. Use the first Stomper Boot to destroy the Durable Blocks and bounce on the lava and Gordos, eventually gaining access to the second Stomper Boot. Use the second Stomper Boot to bounce on the molten rocks and Gordo, and destroy the Durable Blocks at the end.
- Use the Prism Shield to defeat the Key Dee at the end of the elevator room. Grab the Key and enter the door. Quickly traverse the room, as the Key has a time limit, while also avoiding obstacles such as Hunter Scarfies, red Degouts, molten rocks, Iron Barbars, and other enemies.
- Use Ultra Sword to cut the volcano in half. Inside the volcano is the Dimensional rift zone. Enter the Dimensional rift and defeat the purple and Fire Sphere Doomers at the end.
In Other Languages
| Names, etymology and in other regions | ||
|---|---|---|
| Language | Name | Definition, etymology and notes |
| デンジャラス ディナー | Officially romanized as Dangerous Dinner. | |
| Dangerous Dinner | ||
(Simplified) |
危险晚餐 | Translates to Dangerous Dinner. |
| Nacho-Nervenkitzel | Translates to Nacho Thrill. | |
(General) |
Terrain tonitruant | Translates to Thunderous Terrain. |
| Cena Cimentosa | Translates to Dangerous Dinner. | |
| Volcán Vainilla | Translates to Vanilla Volcano. | |
| Rocas de Rábano | Translates to Radish Rocks. | |
Trivia
- Stage 3 of Dangerous Dinner contains a secret area; in the last room, Kirby must float up to the molten planetoid toward the top of the screen and press up. He will enter it like he would enter a door. The room is windy and will push Kirby downwards. He can collect food, stars, red stars and a blue star as he falls.
- This room is a reference to the secret room accessed by entering the moon in Kirby's Dream Land, Kirby Super Star and Kirby Super Star Ultra.

Haldera Volcano
- A stage based on Stage 1 of Dangerous Dinner appears in Kirby Fighters Deluxe. It is named Haldera Volcano after the music track of the same name, which is likely a portmanteau of caldera (a volcanic feature) with HAL, a name created in a similar fashion to those of the Halberd and Halcandra.
- The music played in the first two stages is reused for Stage 7 of Endless Explosions in Kirby: Triple Deluxe.
- The map music is featured as a track in Super Smash Bros. Ultimate.


- In Kirby Star Allies, when playing the Guest Star ???? Star Allies Go! sub-game as Magolor, some stage layout in Level 5 is changed to reflect Stage 3 of Dangerous Dinner from Kirby's Return to Dream Land. The "dimensional rift sequence" replicates some layout from Stage 5 of Egg Engines (despite that portion being on Halcandra, not inside a rift), and Sphere Doomers are represented by a Bronto Burt Room Guarder and Twin Vividria.
- Infinite Power, the theme of Stage 3, is part of the medley that plays in Heroes in Another Dimension.
")


